“One PC Project Becomes Two PC Project”
Well my wife’s main laptop is on its last knees, with a big white stripe across the LCD. I’ve “fixed it up” with an external monitor, but it’s now beginning to croak in other ways. Since it was bought waaaay back in 2005 (not bad for a Dell, it’s an Inspiron 510m), it’s time for a replacement.
I was considering replacing it with a mac mini running ubuntu, but although the mac mini is really great hardware, spending RM2k for it and still having to tweak things to run ubuntu didn’t sound like good value for money.
You may remember some time back I got so fed up with my intel motherboard and powerlogic casing that I upgraded both of them. What was left with was almost enough to be-rebuilt into a computer; it just needed a new CPU, hard disk and power supply. So it was the “ideal” solution to replace my wife’s laptop.
But oh something had to be done with the horrible noise from the 2x 60mm fans in that casing. Something drastic. Something so drastic it can only be done with a PC I wasn’t 100% dependent on at the moment … I was going to cut the casing and install a 120mm fan.
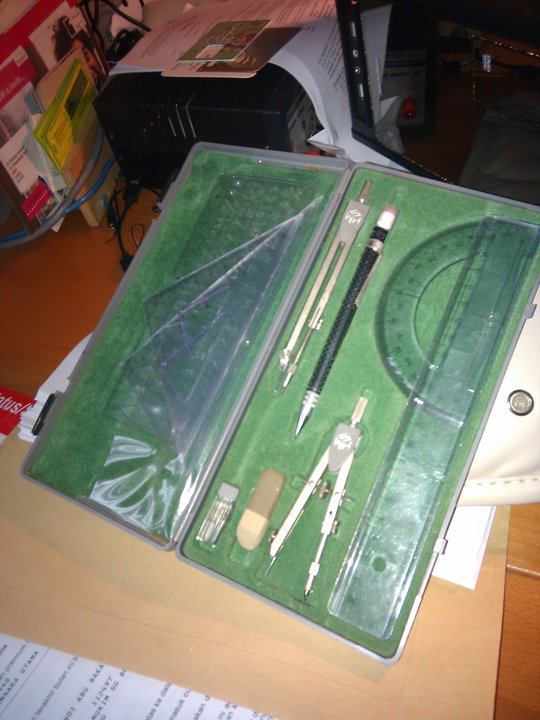
To start with, I needed to mark the area to be cut. I dug out my instrument set … which was given to my by my Uncle Paul when I was in standard 5 (in 1983 — see how well I kept it!).
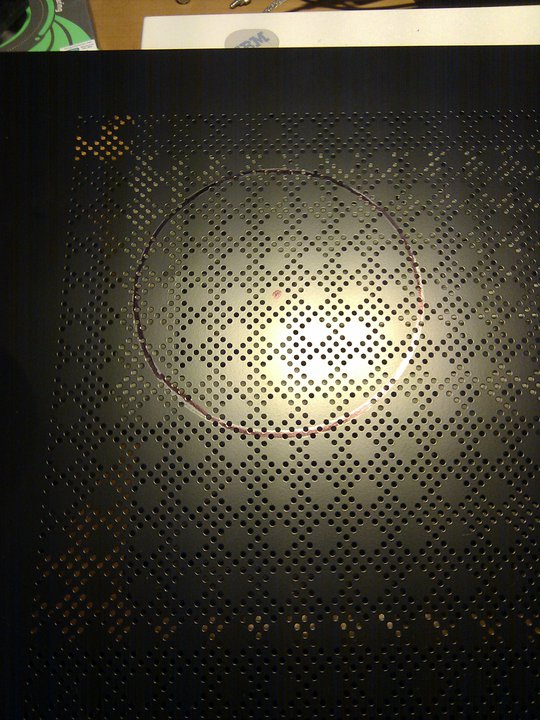
Using the compass … I traced a circle around the casing, and marked it with a marker pen.
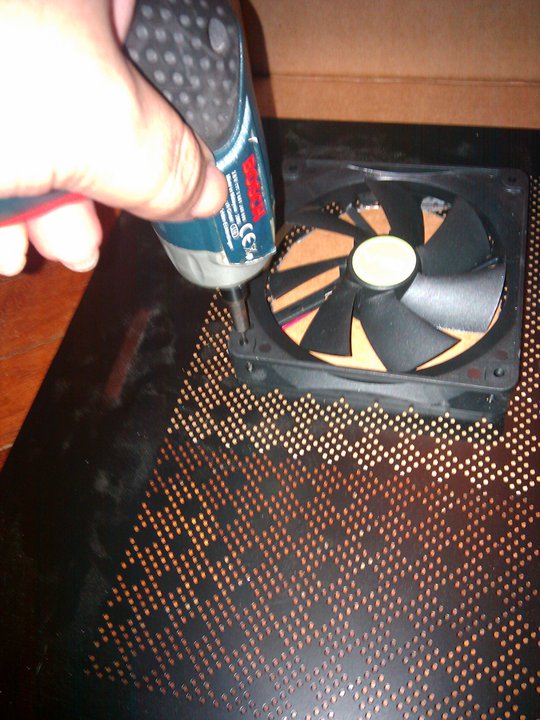
Then for the really fun part … using a cutting disc on my B&D RTX (dremel-like rotary tool), I cut out the circle:
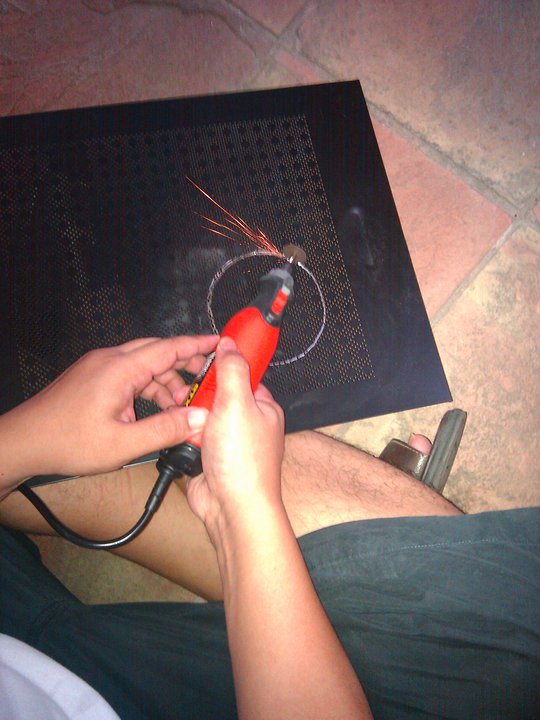
You have to be really patient and go slowly, ideally keeping the disc at the the right angle and cutting a little at a time, so that it traces the circle well. Whole process took me about 15 minutes.
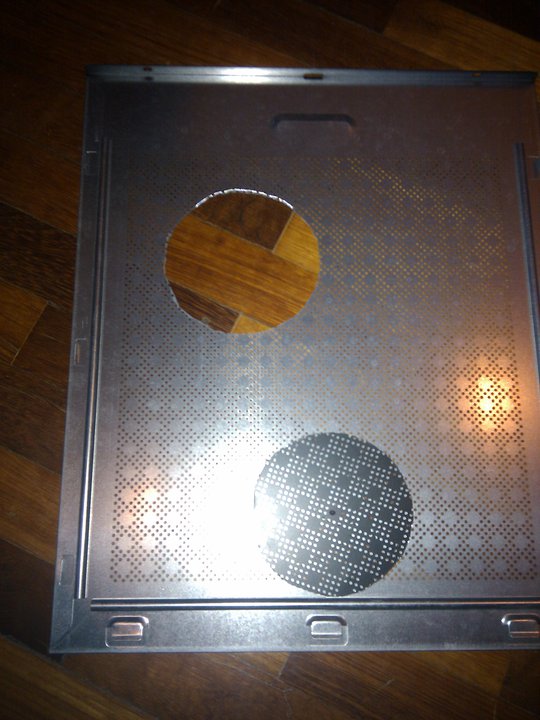
Finally, used a grinding stone on the RTX to smoothen the jaggged edges. And just to make use of things that I don’t get to use, finished it off with a sanding roll using the RTX again. The end result is … a hole:
Next I marked the holes where the fan’s screws would go. I used the tiny pilot hole drill bit to indicate the position, then used my B&D drill to make the holes. Along the way …
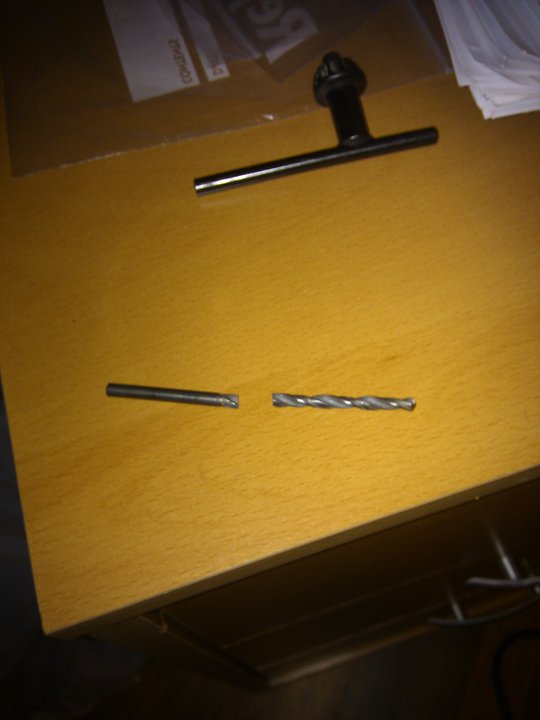
… I broke a drill bit. Should have taken more time and done one side of holes, and then only marked the other side, as my holes weren’t that accurate (screw bengkok a bit going in).
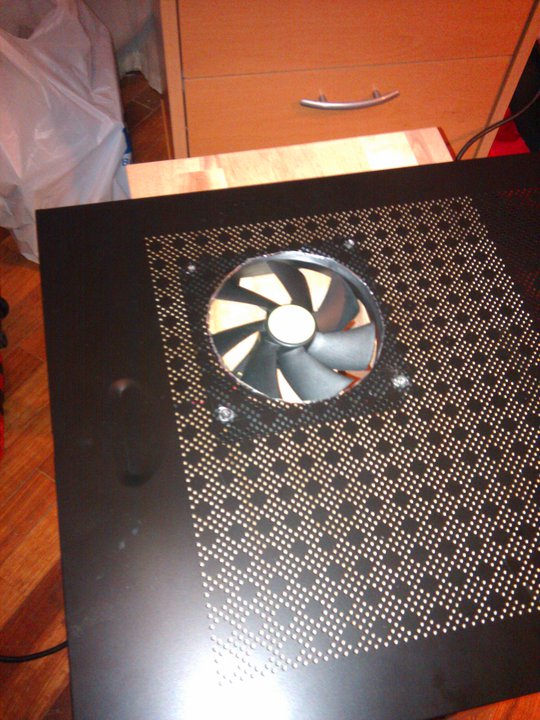
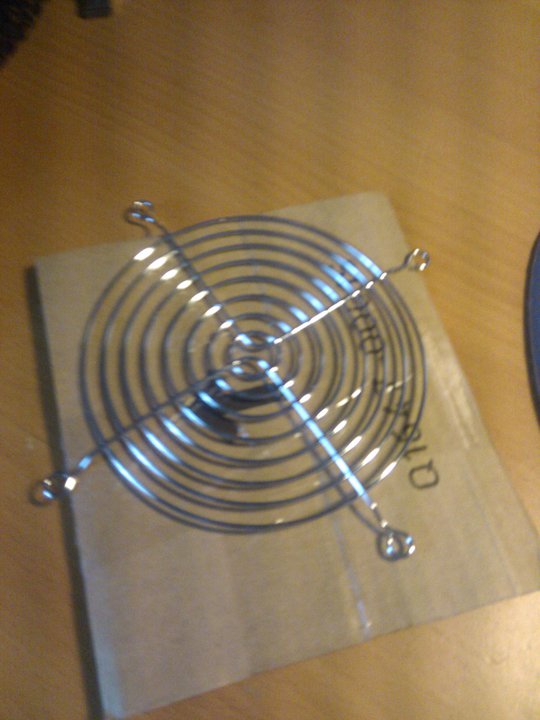
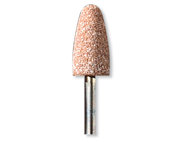
It also really needs a 120mm grill cover (just ordered on lowyat.net for RM9.50), not just to protect fingers, but also to hide the ugly drill marks. I might do some touch up with black paint when I that arrives.
Next … was to install the new stuff I bought:
I bought:
-
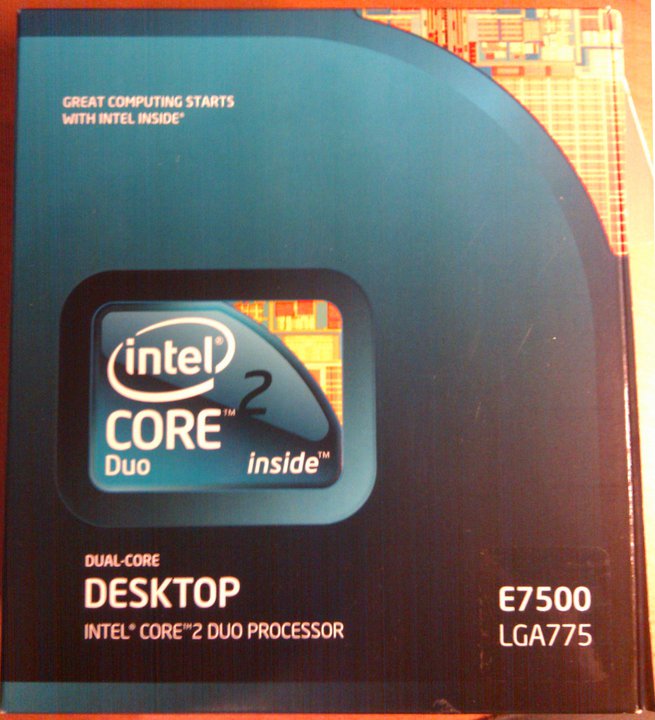
- Intel Core 2 Duo E7500 at 2.97Ghz. This makes my wife’s PC teh fastest in the house … 8-( But it’s only two cores compared to my quad-core … 😎
- Seagate 500GB Hard Disk (cheapest decent capacity I could find, it’s more than 4x what was in her notebook)
-
- Power Supply
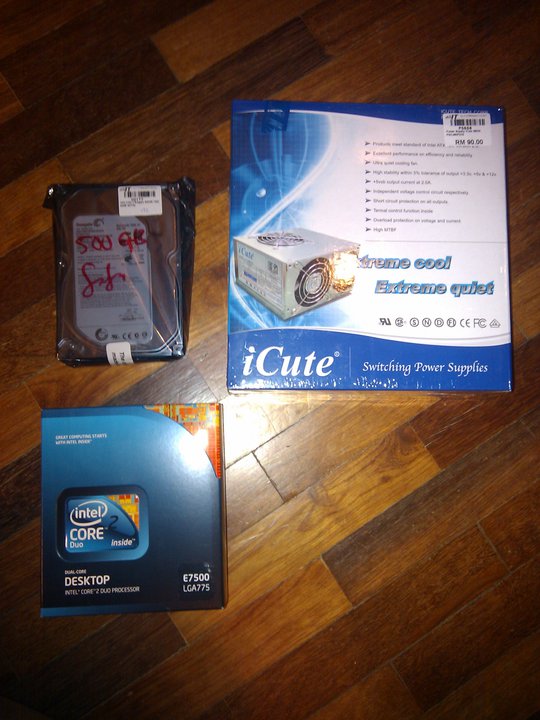
If you’re buying a E7500 check that it has an S-Spec (labelled on the box) of SLGTE. The older ones don’t have a VT-X capability, which makes a difference if you’re trying to run a 64-bit vmware session.
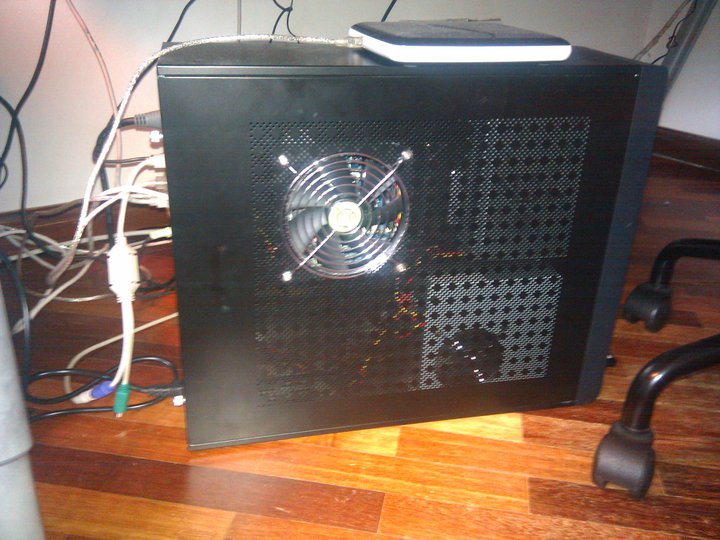
Installed all the bits into the casing (a pain with the non-standard design):
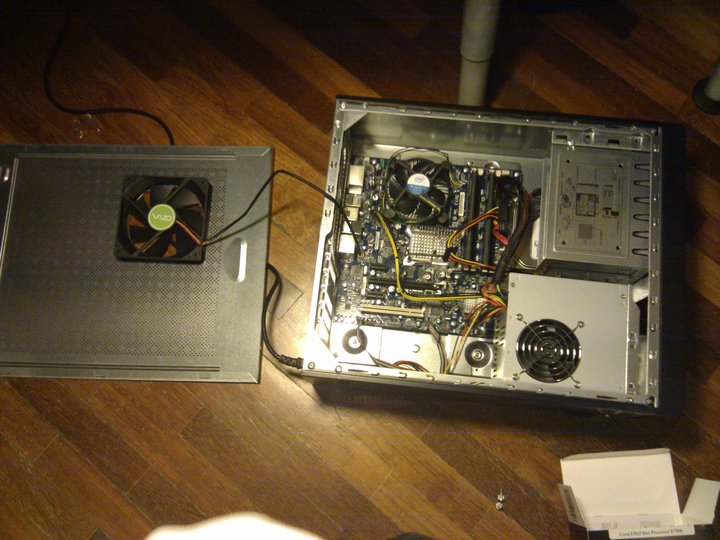
I ripped out the bloody noisy 60mm fans from the casing (Might drive over them with the car tomorrow).
Powered it up …
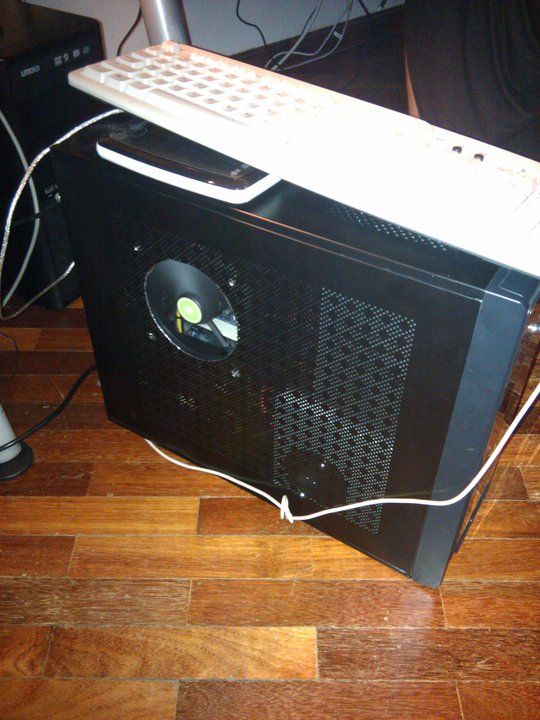
… and it runs really quiet. Really really quiet. Quiter than my coolermaster quad-core pc even (hmm … Tomorrow must open up the other PC and give it a good vacuuming).
Hopefully it’s cool enough … have to monitor the temps over the next few days.
Next to install basic windows setup, and then Ubuntu 10.4 (finally have a PC to experiment 10.4 on).
Update 2 July – Added Fan Grille
This arrived in the post today:
So I shutdown the wife’s PC, popped the casing off, and took off the fan. The useless screws I had before all got stripped, so I had to hunt around in my box of junk for a replacement set (note to self: one of these days, please consolidate the boxes of junk into one box of junk).
Also since the didn’t quite drill the holes correctly when I first made them, they needed some touch up. Rather than drill them back, I used the grinding stone bit on the RTX:
It’s quite useful to make the hole bigger or to expand it in one direction … there’s a bit of resistance at first but then the heat softens the metal and it starts grinding away. With all the holes aligned with the fan properly, I fixed the grille on:
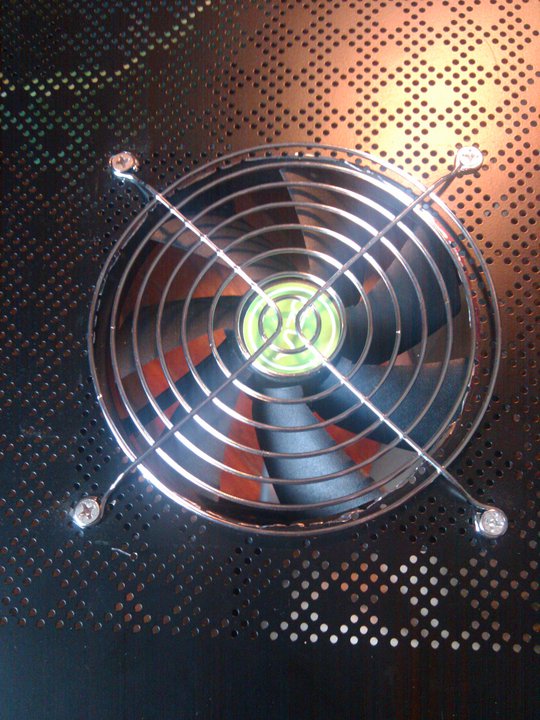
I must say, it looks like a more “professional job” with the grill cover on. Here’s what it looks like now:
This post was originally published as a Facebook Note at 2010-06-26 22:53:49 +0800.