Turning a Raspberry Pi Pico into a libgpiod GPIO Adapter for a Debian 13 PC
When developing for embedded Linux, I prefer to do the heavy lifting on my desktop PC and port the code over later. However, a common roadblock is that most desktops lack native GPIO support.
Today, I explored ways to bridge this gap and discovered a simple, affordable solution to add GPIO capabilities to a standard PC. Crucially, it offers full support for libgpiod (the modern GPIO API), which makes the resulting code highly portable.
I asked my friend Claude to summarize my findings in the blog post below.
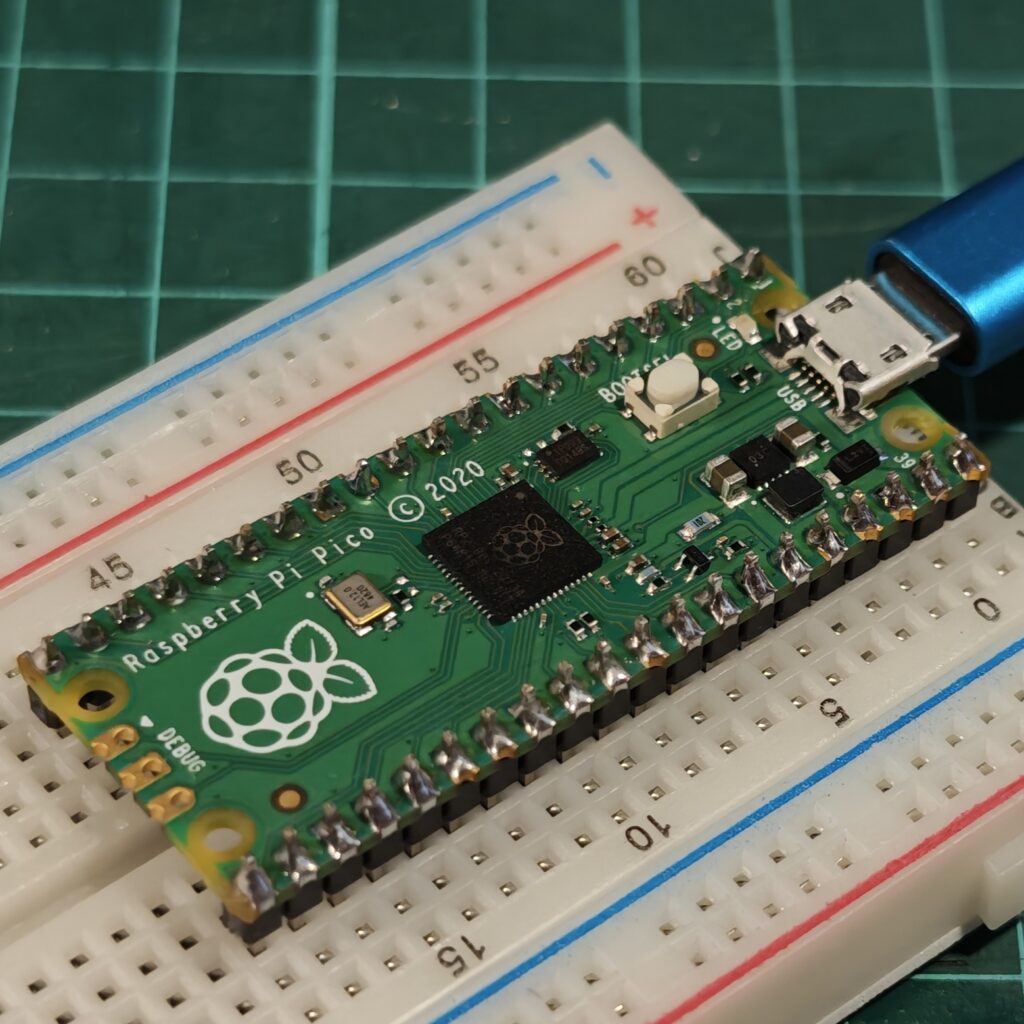
Sometimes you want a handful of GPIO lines on a regular PC — to drive an LED, read a button, bit-bang a sensor, or wire up a hobby KVM — without buying a dedicated USB-GPIO chip. It turns out a Raspberry Pi Pico (the ~$4 RP2040 board) can do exactly that, and the lines show up as a normal gpiochip device that libgpiod manages just like any other GPIO controller.
This post walks through the whole thing on a Debian 13 (trixie) desktop: how the trick works, how to build and flash the firmware, how to build the kernel drivers Debian no longer ships, and finally how to blink the Pico’s onboard LED through libgpiod.
The problem: a Pico is not a gpiochip
libgpiod is just userspace tooling on top of the Linux kernel’s GPIO character-device interface — the /dev/gpiochipN nodes. Those nodes are created by kernel drivers. A bare Pico is a microcontroller running its own firmware; the host kernel has no idea its pins exist, so nothing appears and there’s nothing for libgpiod to talk to.
To make the Pico’s lines manageable by libgpiod, we need a kernel driver on the PC that exposes them as a gpiochip. We’re not going to write one. Instead we’ll make the Pico impersonate a device that already has a mainline kernel driver.
How the solution works: the DLN-2 disguise
The Diolan DLN-2 is a commercial USB-to-I2C/SPI/GPIO adapter. Crucially, Linux has shipped mainline drivers for it since kernel 3.18 — a small family of modules:
dln2— the MFD (multi-function device) core that talks the USB protocolgpio-dln2— registers the GPIO lines as agpiochipi2c-dln2— registers an I2C adapter (/dev/i2c-N)spi-dln2— registers an SPI controllerdln2-adc— exposes the ADC through the IIO subsystem
So if the Pico speaks the DLN-2 USB protocol, the kernel’s existing dln2 stack binds to it and we get a real gpiochip for free. That’s exactly what notro’s pico-usb-io-board firmware does: it turns the Pico into a USB I/O board implementing the DLN-2 protocol (plus two CDC UARTs as a bonus).
The full data path looks like this:
  your program
       │
   libgpiod (userspace)
       │
  /dev/gpiochipN
       │
  gpio-dln2  ──┐
  i2c-dln2     ├─ kernel modules
  spi-dln2   ──┘
       │
     dln2 (MFD core)
       │  USB
       ▼
  Raspberry Pi Pico
  running pico-usb-io-board firmware
  (speaks the DLN-2 protocol)
Two wrinkles make this a little more involved than “flash and go,” and they’re the reason for most of this post:
- The firmware needs building. notro’s repo was archived in January 2025 and is pinned to an old Pico SDK, so it no longer compiles against a current toolchain. We’ll use the
tao-jfork, whose key commit updates the bundledpico-sdkto 2.2.0 and fixes the resulting compile errors. (It changes nothing about runtime behavior — same protocol, same USB ID, same kernel contract.) - Debian 13 dropped the drivers. trixie’s stock kernel no longer builds the DLN-2 modules. We’ll build them ourselves with DKMS so they survive kernel upgrades.
One honest caveat before we start: this is GPIO over USB. It’s great for setting outputs, reading inputs, and catching button/edge events, but USB round-trip latency means it is not suitable for microsecond-accurate timing or fast bit-banging. For that you’d write Pico-side firmware to handle the timing-critical part locally.
What you’ll need
- A Raspberry Pi Pico (RP2040). The steps target the original Pico; a Pico 2 / RP2350 is possible but needs extra board-config work not covered here.
- A Debian 13 (trixie) desktop, kernel
6.12.x(this post was written against6.12.94+deb13-amd64). - A USB cable and the Pico’s BOOTSEL button.
- Root access on the PC.
Part 1 — Build the firmware and flash it
1.1 Install the build toolchain
The Pico SDK cross-compiles with the ARM bare-metal toolchain and builds a couple of native host tools along the way, so you need both:
sudo apt update
sudo apt install git cmake build-essential python3 \
     gcc-arm-none-eabi libnewlib-arm-none-eabi libstdc++-arm-none-eabi-newlib
1.2 Clone the fork (with submodules)
pico-sdk is a git submodule of the project, and the SDK has its own submodules (TinyUSB). A recursive clone pulls everything — this is the single most common thing people get wrong:
git clone --recurse-submodules https://github.com/tao-j/pico-usb-io-board.git
cd pico-usb-io-board
If you ever forget the flag, fix it with:
git submodule update --init --recursive1.3 Build
The project wraps the normal CMake flow in a script:
./build.sh(You can set BUILD_DIR to redirect the build output elsewhere.) When it finishes, find the firmware image:
find . -name '*.uf2'That .uf2 is what you flash.
1.4 Flash via BOOTSEL
The Pico’s ROM bootloader presents itself as a USB mass-storage drive, so flashing is just a file copy — no special tool required:
- Unplug the Pico.
- Press and hold the BOOTSEL button.
- While holding it, plug the Pico into the PC.
- Release BOOTSEL once a drive named
RPI-RP2appears. - Copy the firmware onto it:
cp ./build/pico-usb-io-board.uf2 /media/$USER/RPI-RP2/   # adjust path to your .uf2
sync
The Pico reboots automatically as the copy completes, the drive disappears, and it comes back running the firmware. Confirm it enumerated:
lsusb | grep 1d50:6170You should see the device at USB ID 1d50:6170. (That’s an Openmoko FOSS product ID the firmware uses — remember it, because it matters in Part 3.)
Part 2 — Build the dln2 kernel drivers for Debian 13
At this point the Pico is on the bus, but nothing binds to it. If you try to load the driver:
# modprobe -b dln2
modprobe: FATAL: Module dln2 not found in directory /lib/modules/6.12.94+deb13-amd64
This isn’t a missing package — it’s a config choice. Debian trixie trimmed a number of modules that earlier releases shipped, and the DLN-2 family is in that set. Confirm it on your machine:
grep -E 'DLN2' /boot/config-$(uname -r)If you get # CONFIG_MFD_DLN2 is not set or no output at all, the modules simply weren’t built. The good news: the driver sources are mainline and self-contained, so we can compile just those five files against our installed kernel headers and wrap them in DKMS so they auto-rebuild on every kernel update.
2.1 Install DKMS, headers, and kernel source
sudo apt install dkms build-essential linux-headers-$(uname -r) linux-source-6.122.2 Stage the driver source under /usr/src
DKMS requires the source to live permanently in /usr/src/<name>-<version>/, since it re-reads it on every rebuild. Extract the five driver files there:
sudo mkdir -p /usr/src/dln2-1.0
cd /usr/src/dln2-1.0
sudo tar xf /usr/src/linux-source-6.12.tar.xz --wildcards --strip-components=4 \
  '*/drivers/mfd/dln2.c' \
  '*/drivers/gpio/gpio-dln2.c' \
  '*/drivers/i2c/busses/i2c-dln2.c' \
  '*/drivers/spi/spi-dln2.c' \
  '*/drivers/iio/adc/dln2-adc.c'
Confirm you ended up with five flat .c files:
ls /usr/src/dln2-1.0
# dln2-adc.c  dln2.c  gpio-dln2.c  i2c-dln2.c  spi-dln2.c
The --strip-components=4 drops the */drivers/<subsys>/ path prefixes so the files land flat. If your tar puts them in subdirectories instead, just move them up:
sudo find . -name '*.c' -exec mv -t . {} +
sudo rm -rf drivers
You do not need dln2.h — it ships in linux-headers as include/linux/mfd/dln2.h and resolves at build time.
2.3 Add the Makefile and dkms.conf
sudo tee /usr/src/dln2-1.0/Makefile >/dev/null <<'EOF'
obj-m += dln2.o gpio-dln2.o i2c-dln2.o spi-dln2.o dln2-adc.o
EOF
sudo tee /usr/src/dln2-1.0/dkms.conf >/dev/null <<'EOF'
PACKAGE_NAME="dln2"
PACKAGE_VERSION="1.0"
AUTOINSTALL="yes"
MAKE[0]="make -C ${kernel_source_dir} M=${dkms_tree}/${PACKAGE_NAME}/${PACKAGE_VERSION}/build modules"
CLEAN="make -C ${kernel_source_dir} M=${dkms_tree}/${PACKAGE_NAME}/${PACKAGE_VERSION}/build clean"
BUILT_MODULE_NAME[0]="dln2"
BUILT_MODULE_NAME[1]="gpio-dln2"
BUILT_MODULE_NAME[2]="i2c-dln2"
BUILT_MODULE_NAME[3]="spi-dln2"
BUILT_MODULE_NAME[4]="dln2-adc"
DEST_MODULE_LOCATION[0]="/updates/dkms"
DEST_MODULE_LOCATION[1]="/updates/dkms"
DEST_MODULE_LOCATION[2]="/updates/dkms"
DEST_MODULE_LOCATION[3]="/updates/dkms"
DEST_MODULE_LOCATION[4]="/updates/dkms"
EOFAUTOINSTALL="yes" is the line that makes DKMS rebuild against future kernels automatically. The DEST_MODULE_LOCATION entries are effectively forced to /updates/dkms by modern DKMS but still have to be present.
2.4 Register, build, install
sudo dkms add -m dln2 -v 1.0
sudo dkms build -m dln2 -v 1.0
sudo dkms install -m dln2 -v 1.0
Verify and load:
dkms status dln2          # should report: installed
sudo modprobe dln2        # should now succeed
Secure Boot note: if Secure Boot is enabled (
mokutil --sb-statesays enabled), unsigned out-of-tree modules won’t load. Enroll a Machine Owner Key (mokutil --import, reboot to confirm) and configure DKMS signing so each build is signed. If Secure Boot is disabled, ignore this.
Part 3 — Bind the driver to the Pico
Loading dln2 still doesn’t grab the Pico, for a subtle reason: the firmware advertises USB ID 1d50:6170, but the in-kernel dln2 driver only matches Diolan’s real ID. So we have to tell the driver to also accept our ID, via a udev rule that loads the module and writes the ID to the driver’s new_id:
sudo tee /etc/udev/rules.d/40-usb-dln2.rules >/dev/null <<'EOF'
ACTION=="add", SUBSYSTEM=="usb", \
        ATTR{idVendor}=="1d50", ATTR{idProduct}=="6170", \
        RUN+="/sbin/modprobe -b dln2"

ACTION=="add", SUBSYSTEM=="drivers", ENV{DEVPATH}=="/bus/usb/drivers/dln2", \
        ATTR{new_id}="1d50 6170 ff"
EOF

sudo udevadm control --reload
Now replug the Pico and check:
gpiodetectYou should see something like:
gpiochip0 [INTC1056:00] (473 lines)
gpiochip1 [dln2] (29 lines)
gpiochip1 [dln2] is your Pico, now a first-class GPIO controller on the system.
Part 4 — Demonstration: light the onboard LED
The Pico’s onboard LED is wired to GPIO 25, and on this firmware GPIO 25 is “sticky” — it holds its state after the controlling process exits, which makes it a perfect test pin.
A note on libgpiod v1 vs v2
Debian 13 ships libgpiod v2, whose command-line syntax differs from the v1 examples you’ll find all over the web. Two changes trip people up:
- The chip is passed with
-c, not as a positional argument:gpioset -c <chip> <line>=<value>. - That
-cvalue is the chip’s device name or path (gpiochip1//dev/gpiochip1), not the label in brackets (dln2). Passing the label givescannot find GPIO chip character device 'dln2'.
So the literal command is:
gpioset -c gpiochip1 25=1…and the LED lights up.
Do it the robust way
The chip number isn’t stable — gpiochip1 today might enumerate as gpiochip2 after a reboot or replug, depending on ordering against the host’s own controllers. Don’t hardcode it. Resolve the chip by its dln2 label instead:
chip=$(gpiodetect | awk '/\[dln2\]/{print $1}')

gpioset -c "$chip" 25=1     # LED on
gpioset -c "$chip" 25=0     # LED off
That always finds the Pico whatever number it landed on.
Reading and watching pins
The same -c pattern applies to the rest of the toolset:
gpioget -c "$chip" 12       # read an input pin
gpiomon -c "$chip" 12       # watch for edge events
One behavioral gotcha: in v2, gpioset exits immediately by default and releases the line. GPIO 25 holds its value because it’s sticky, but on a normal output pin releasing the line drops it back to default. To hold an ordinary output, keep the process alive:
gpioset -c "$chip" -t0 12=1 # hold 12 high until Ctrl-CPin caveats
A few pins behave specially on this firmware: GPIO 23 and 24 aren’t on the Pico header and will error; GPIO 4 and 5 get claimed as I2C pins, and GPIO 17 as SPI chip-select, if those sub-drivers load. If you want 4, 5, or 17 as plain GPIO, prevent i2c-dln2 / spi-dln2 from loading.
Wrapping up
With three pieces in place — the DLN-2-speaking firmware on the Pico, the DKMS-built dln2 kernel modules, and the udev rule that binds them — a $4 microcontroller becomes a genuine libgpiod-managed GPIO controller on your Debian desktop. Because the kernel sees a standard gpiochip, everything downstream just works: the gpio* CLI tools, the C/C++/Python libgpiod bindings, and any software that already speaks to GPIO character devices. You also get an I2C adapter, an SPI controller, an ADC, and two UARTs from the same firmware as a bonus.
The DKMS wrapper means a kernel upgrade won’t silently break your setup — DKMS rebuilds the modules automatically, and dkms status flags it if a future kernel ever needs refreshed source. Just keep the USB-over-latency limitation in mind, and this is a remarkably cheap and flexible way to get real GPIO onto a PC.
Credits
- notro/pico-usb-io-board — the original DLN-2 firmware for the Pico.
- tao-j/pico-usb-io-board — the fork that keeps it building against current Pico SDK (2.2.0).
- The DLN-2 kernel drivers are mainline Linux, originally contributed by Octavian Purdila, Daniel Baluta, and Laurentiu Palcu.