Installing PiXPlaneFMCCDU Software
This is a guide on how to install my Pi X-Plane FMC CDU Software, for use with the Pi FMC CDU Printed Circuit Board (PCB) I designed. Thanks to all the testers who provided feedback and corrections to this guide.
Compatibility
- The Pi X-Plane FMC CDU software is compatible with the following X-Plane aircraft and FMCs:
- EADT’s x737-700 and x737-800 (freeware) with Javier Cortes’s x737FMC (payware).
- Zibo 737-800X (freeware) with built-in FMC (Update: bugs fixed, see https://blog.shahada.abubakar.net/wp-admin/post.php?post=8379)
- In the future, support for the following FMCs will be added:
- Any aircraft running with X-FMC (freeware)
- Anything else I get my hands on that supports input and output to external hardware.
Licensing / Warranty
- This software is licensed under the GNU General Public License version 3.
- Source code is available at https://github.com/dotsha747/Pi-XPlane-FMC-CDU.
- Questions? Post them here: https://blog.shahada.abubakar.net/?p=8211
Before You Start
- Pre-requisites:
- You will need one of the following:
- Raspberry Pi 3 Model B
- Raspberry Pi 2 Model B (what I used)
- Raspberry Pi 1 Model B (not tested)
- If you are using a wired network interface, connect the Raspberry Pi to your network switch.
- If you are using WiFi on a Pi 1 or 2 (the Pi 3 has WiFi built-in), plug in a supported USB Wifi Dongle
- Your Raspberry Pi is connected to the FMC CDU display
- You have a USB keyboard plugged into the Raspberry Pi’s USB port
- You have a microSD card that you can erase and install the raspberry pi’s Raspbian operating system and FMC software on
- You will need one of the following:
Install Raspbian Stretch
- On your Ubuntu Linux or Windows Desktop PC:
- Download the latest Raspbian Stretch Lite image:
- Download Raspbian Stretch Lite from https://www.raspberrypi.org/downloads/raspbian/.
- Make sure to download the “Minimal/Lite” image, and not the Desktop image. Pi XPlane FMC CDU software needs direct access to the graphical framebuffer, and having a windowing/desktop layer gets in the way of that.
- The version I used was “2017-11-29”, but it should work with a later version.
- Download Etcher tool to write image to microSD card
- https://etcher.io/
- click “Download for …”
- unzip etcher zip file
- click on the program
- “No” to installing a desktop file if you only plan to use it just once for this install
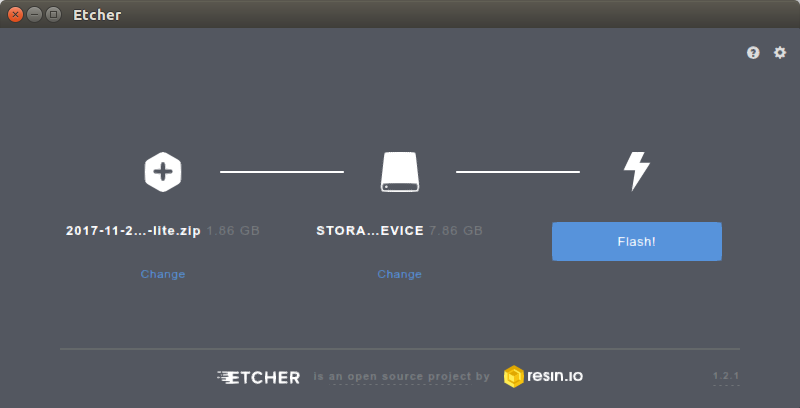
- Etcher program will start
- Insert microSD card into a SD Card reader connected to PC
- Click “Select Image” and choose the Raspbian Stretch Lite image you downloaded earlier.
- Confirm Storage Device is referencing your microSD card
- Click “Flash!” and wait till “Flash Complete!” is displayed
- Download the latest Raspbian Stretch Lite image:
-
- Remove the microSD card from the PC’s usb reader and insert it into the Raspberry Pi 3
- Power on the Raspberry Pi
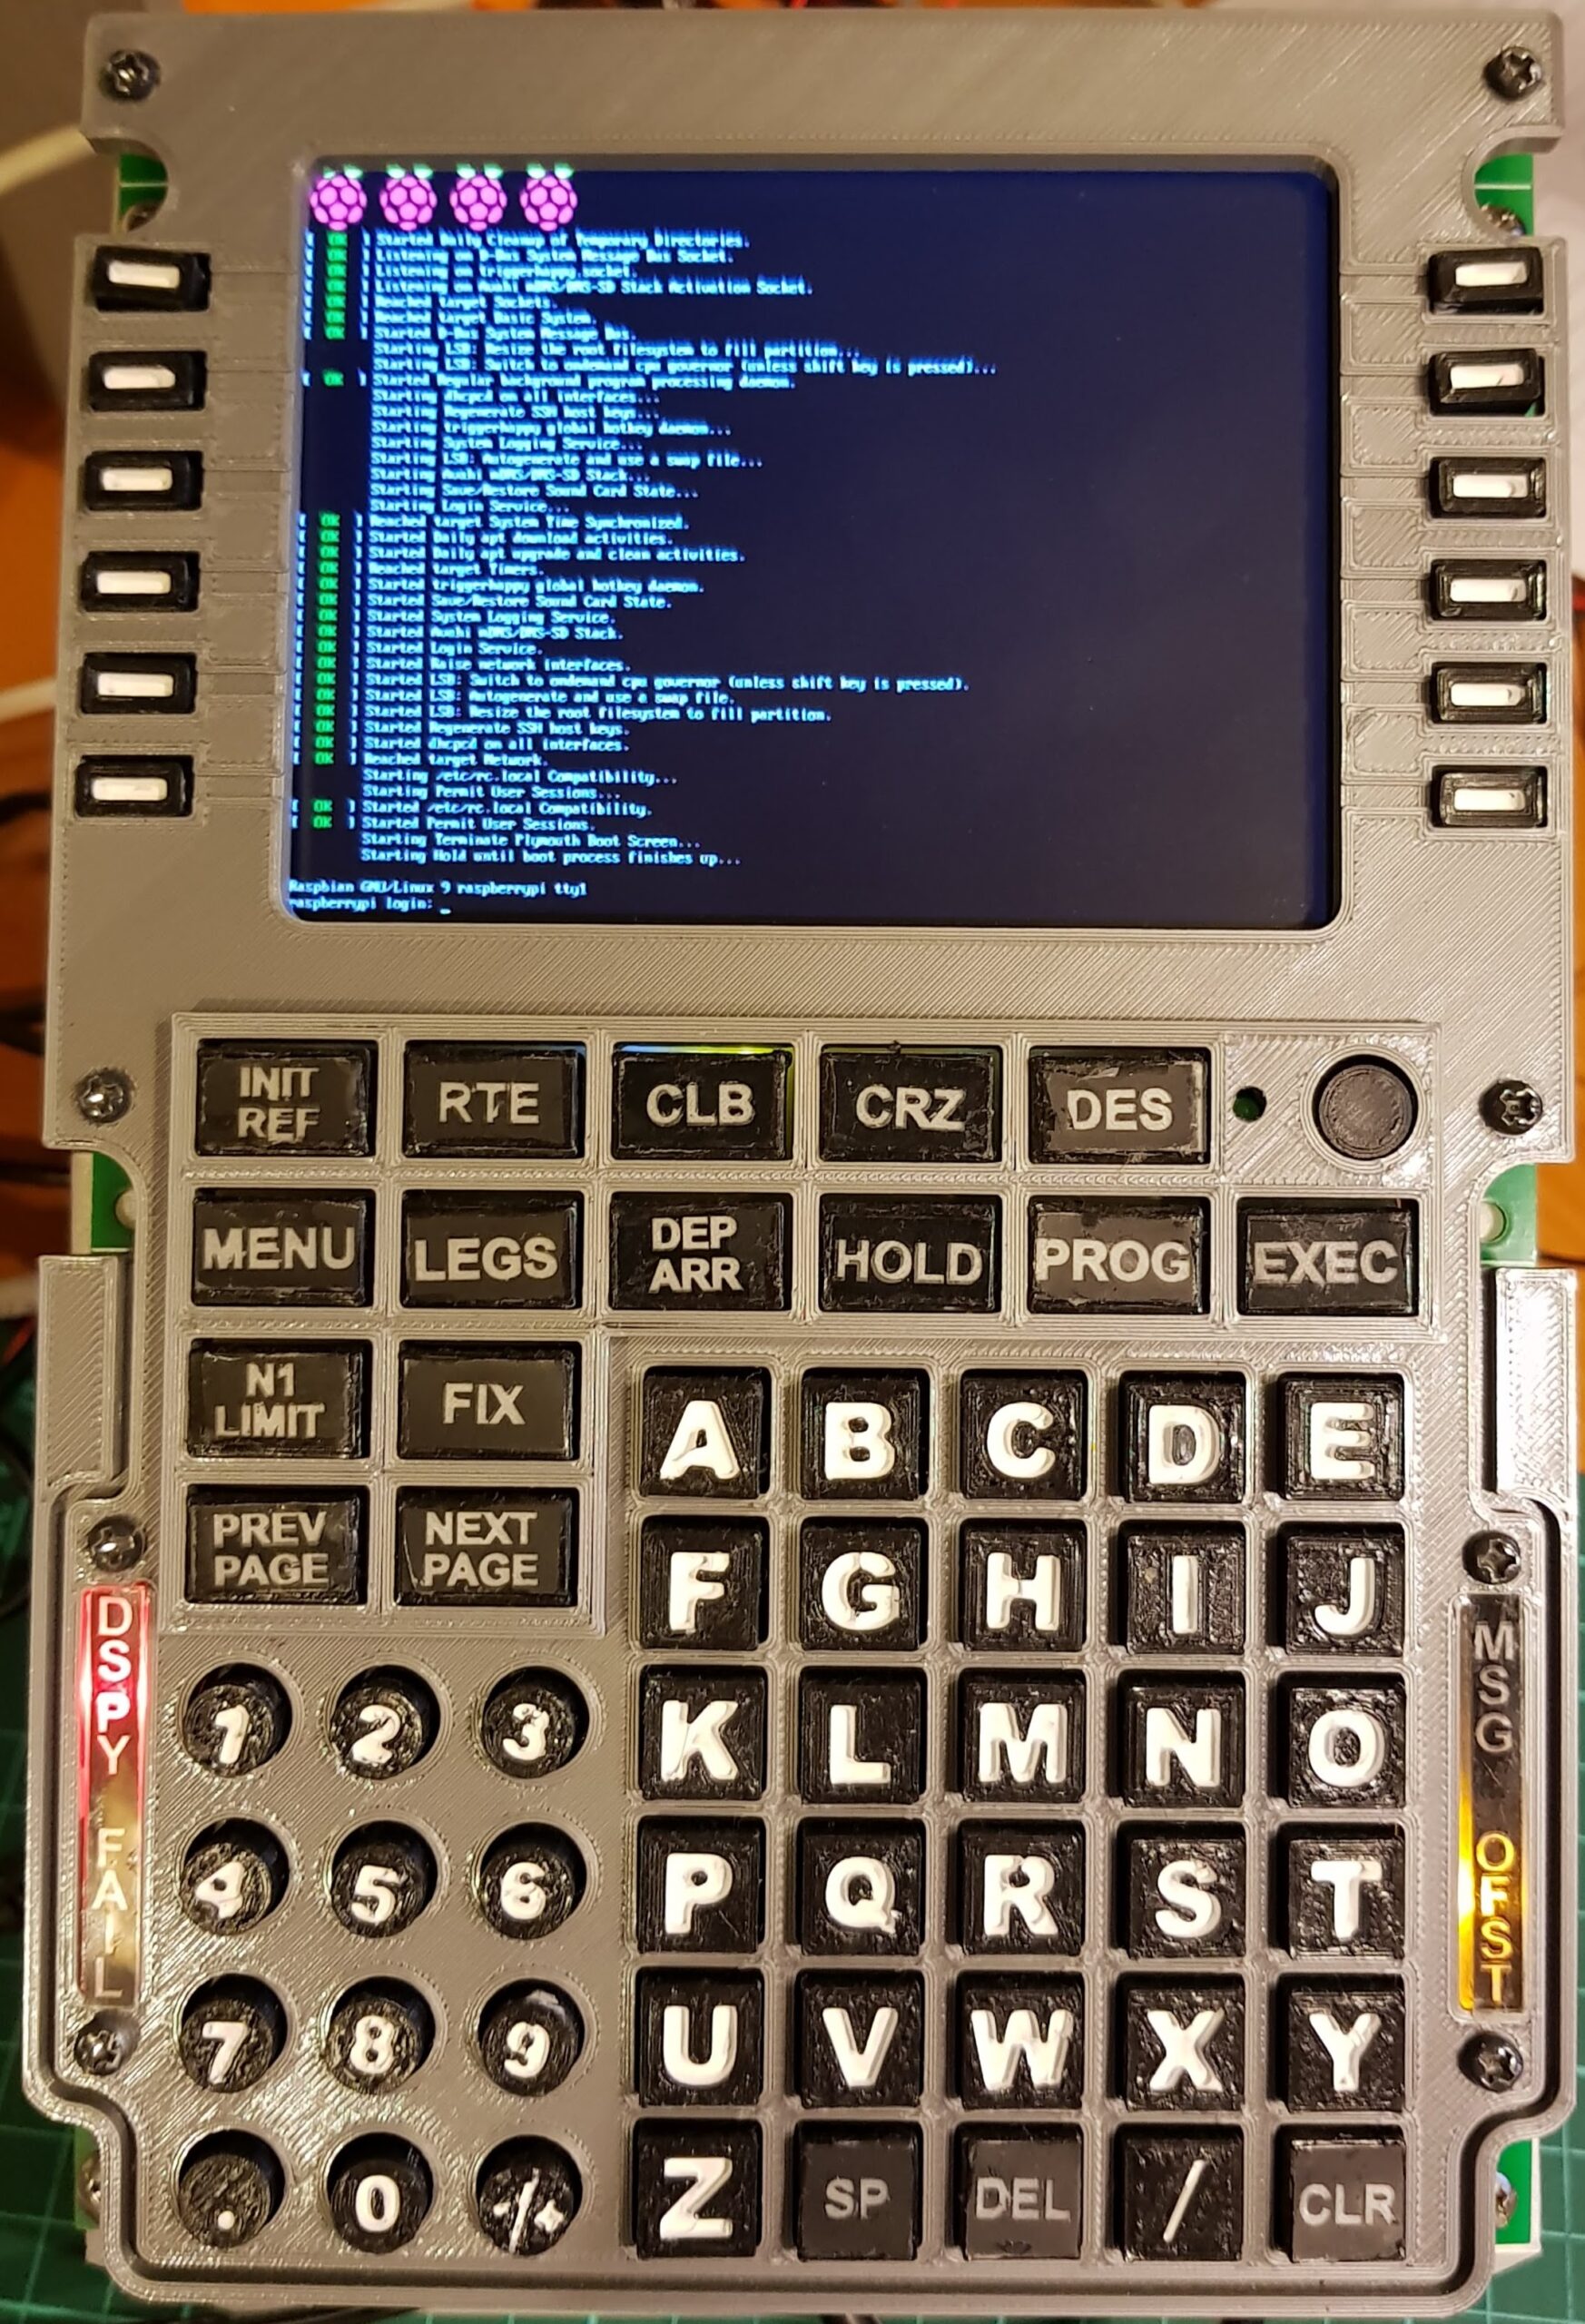
- If your image is flashed properly, you will see the “rainbow” screen, followed by a number of console messages. Finally a login prompt will appear.
Configure Raspbian Stretch
- Login as user “pi” password “raspberry”. You should get the following Pi shell prompt on your display:
- pi@raspberrypi:~ $
- This means your Pi is expecting you to type in a command.
- Configure networking on your Pi
- Execute the following
- sudo raspi-config
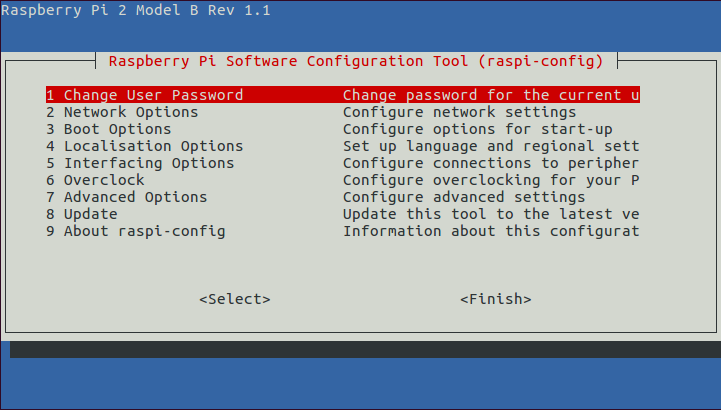
- This will run raspi-config, a menu-based program to configure the raspberry pi settings, which looks like this (The model number at the top right will depend on your Pi model):
- Execute the following
-
- Use the arrow keys and move the cursor to “2 Network Options” and press ENTER
- Select “1. Hostname” and key in “PiXPlaneFMCCDU” (or any other name you desire)
- If you are using WiFi, configure your WiFi network
- Use the arrow keys and move the cursor to “2 Network Options” and press ENTER
- Select “2. Wi-Fi”
- Enter your WiFI SSID and press ENTER
- Press Tab and select Finish
- Select “Yes” and press ENTER to reboot.
- login as user “pi” and password “raspberry”
- Verify the Pi is connected to the internet by executing the following:
- ping google.com
- Press control-C to stop the pinging. You should get a response like this (names and IPs will differ depending on your location):
- PING google.com(kul09s03-in-x0e.1e100.net (2404:6800:4001:801::200e)) 56 data bytes
- 64 bytes from kul09s03-in-x0e.1e100.net (2404:6800:4001:801::200e): icmp_seq=1 ttl=57 time=23.2 ms
- 64 bytes from kul09s03-in-x0e.1e100.net (2404:6800:4001:801::200e): icmp_seq=2 ttl=57 time=22.6 ms
- ^C
- — google.com ping statistics —
- 2 packets transmitted, 2 received, 0% packet loss, time 1001ms
- rtt min/avg/max/mdev = 22.647/22.930/23.214/0.321 ms
- It is advisable at this stage to login to your router and configure a fixed DHCP IP assignment to the raspberry Pi. This is not strictly required but will help with troubleshooting. Restart the Pi after you’ve done this so it acquires a new IP address.
- Use the arrow keys and move the cursor to “2 Network Options” and press ENTER
- Update the Raspbian by executing the following:
- sudo apt-get update ; sudo apt-get –yes upgrade
- Raspbian comes set up for a UK locale and keyboard. If you’re using something else (quite likely if you don’t have a “£” key on your keyboard) then you will need to change it. Not doing this will give you problems typing certain characters such as the double-quote and pipe symbol.
- Configure locale:
- Execute the following:
- sudo raspi-config
- Use arrow keys to move cursor to “4. Localization Options” and press ENTER
- Move cursor to “1. Change Locale” and press ENTER
- Press space on your locale. If you are unsure, try “en_US.UTF-8.UTF-8”.
- Unselect any other locales.
- Press Tab and select OK.
- Select “en_US.UTF-8” as the default locale for your system environment.Press OK
- Use arrow keys to move cursor to “4. Localization Options” and press ENTER
- Move cursor to “3. Change Keyboard Layout” and press ENTER
- Select your keyboard model. If you are unsure, try “Generic 105-key (Intl) PC” and press OK.
- Select “Other” for Keyboard Layout and press OK
- Select your keyboard layout. If you are unsure, try “English (US)”
- Select “English (US)”. Press Tab followed by OK.
- Select “The default for the keyboard layout”. Press Tab followed by OK.
- Select “No compose key”. Press Tab followed by OK.
- Execute the following:
- Press Tab followed by FINISH.
- Execute the following:
- sudo bash -c “echo ‘export LC_ALL=en_US.UTF-8’ >> /etc/profile”
- The prompt should return without any output. At this point your keyboard should be fully functional, and you should be able to type the double-quote (“) and pipe (|) characters normally.
- Configure locale:
- Depending on your display you may need to manually configure the screen resolution, by using raspi-config, “7. Advance Options â 5. Resolution” or editing /boot/config.txt directly.
- You should probably also change the password for the user pi. You can do this by using raspi-config, “1. Change User Password”.
Installation of Pi-XPlane-FMC-CDU Software
- From the pi shell prompt, execute the following:
- wget -O- http://repo.shahada.abubakar.net/pubkey.asc | sudo apt-key add –
- The ouput should be similar to this:
- wget -O- http://repo.shahada.abubakar.net/pubkey.asc | sudo apt-key add –
–2018-01-13 06:20:47– http://repo.shahada.abubakar.net/pubkey.asc
Resolving repo.shahada.abubakar.net (repo.shahada.abubakar.net)… 115.132.31.45
Connecting to repo.shahada.abubakar.net (repo.shahada.abubakar.net)|115.132.31.45|:80… connected.
HTTP request sent, awaiting response… 200 OK
Length: 1744 (1.7K) [text/plain]
Saving to: STDOUTâ
– 100%[===================>] 1.70K –.-KB/s in 0s   Â
2018-01-13 06:20:48 (42.4 MB/s) – written to stdout [1744/1744]
OK
-
- cd /etc/apt/sources.list.d
- The prompt should return without any output.
- sudo wget http://repo.shahada.abubakar.net/repo.shahada.abubakar.net.sources.list
- The output should be similar to this:
- cd /etc/apt/sources.list.d
–2018-01-13 06:29:56– http://repo.shahada.abubakar.net/repo.shahada.abubakar.net.sources.list
Resolving repo.shahada.abubakar.net (repo.shahada.abubakar.net)… 115.132.31.45
Connecting to repo.shahada.abubakar.net (repo.shahada.abubakar.net)|115.132.31.45|:80… connected.
HTTP request sent, awaiting response… 200 OK
Length: 53 [text/plain]
Saving to: repo.shahada.abubakar.net.sources.list
repo.shahada.abubak 100%[===================>] 53 –.-KB/s in 0s
2018-01-13 06:29:57 (1.33 MB/s) – repo.shahada.abubakar.net.sources.list saved [53/53]
-
- sudo apt-get update
- The output should be similar to this:
- sudo apt-get update
Get:1 http://mirrordirector.raspbian.org/raspbian stretch InRelease [15.0 kB] Â
Get:2 http://archive.raspberrypi.org/debian stretch InRelease [25.3 kB]
Ign:3 http://repo.shahada.abubakar.net/apt stable InRelease
Hit:4 http://repo.shahada.abubakar.net/apt stable Release
Get:5 http://mirrordirector.raspbian.org/raspbian stretch/main armhf Packages [11.7 MB]
Get:6 http://archive.raspberrypi.org/debian stretch/main armhf Packages [127 kB]
Fetched 11.8 MB in 2min 10s (90.6 kB/s)
Reading package lists… Done
-
- sudo apt-get install pi-xplane-fmc-cdu
- The output should be similar to this:
- sudo apt-get install pi-xplane-fmc-cdu
Reading package lists… Done
Building dependency tree
Reading state information… Done
The following NEW packages will be installed:
 pi-xplane-fmc-cdu
0 upgraded, 1 newly installed, 0 to remove and 1 not upgraded.
Need to get 0 B/6,000 B of archives.
After this operation, 25.6 kB of additional disk space will be used.
Selecting previously unselected package pi-xplane-fmc-cdu.
(Reading database … 54241 files and directories currently installed.)
Preparing to unpack …/pi-xplane-fmc-cdu_1.0.1.gdb130a5_armhf.deb …
Unpacking pi-xplane-fmc-cdu (1.0.1.gdb130a5) …
Setting up pi-xplane-fmc-cdu (1.0.1.gdb130a5) …
- The installer will also install any other packages required by pi-xplane-fmc-cdu.
- You can update the program to the latest published versions at any time by executing:
- sudo apt-get update
- sudo apt-get upgrade
Testing the FMC Hardware
- It is probably a good idea to make sure your FMC hardware is working properly before proceeding to use it with the simulator. Two test programs are included to check the functionality of the keypad and the LEDs. Make sure that the main FMC program is stopped and not running when you execute these two test programs, weird random results will occur otherwise.
Keypad
- The testFMCKeypad program tests the functionalty of the keypad, and in particular the matrix circuit.
- It is useful to read http://blog.komar.be/how-to-make-a-keyboard-the-matrix/ to get a better understanding of how a matrix keyboard works. In particular, the keypad design I used does not handle simultaneous keypresses (to do so would require a diode on every keyswitch). For the purposes of an FMC CDU simultaneous keypresses are not required.
- The first mode, known as “readall”, shows the state of the inputs, when each output line is enabled (set to 0).
- Running it without any keys pressed should result in the following output:
- testFMCKeypad readall
-----Output (Columns)-----   ------Input (Rows)-----

15 16 01 04 05 06 10 11 27   29 08 09 07 00 02 03 12

 0  1  1  1  1  1  1  1  1    1  1  1  1  1  1  1  1

 1  0  1  1  1  1  1  1  1    1  1  1  1  1  1  1  1

 1  1  0  1  1  1  1  1  1    1  1  1  1  1  1  1  1

 1  1  1  0  1  1  1  1  1    1  1  1  1  1  1  1  1

 1  1  1  1  0  1  1  1  1    1  1  1  1  1  1  1  1

 1  1  1  1  1  0  1  1  1    1  1  1  1  1  1  1  1

 1  1  1  1  1  1  0  1  1    1  1  1  1  1  1  1  1

 1  1  1  1  1  1  1  0  1    1  1  1  1  1  1  1  1

 1  1  1  1  1  1  1  1  0    1  1  1  1  1  1  1  1
- When a single key is pressed it should appear as a single 0 in the Input section, when the appropriate output is enabled (set to 0). Hold down the EXEC key and run the above command again. This is what should appear:
- testFMCKeypad readall
-----Output (Columns)-----   ------Input (Rows)-----
15 16 01 04 05 06 10 11 27   29 08 09 07 00 02 03 12
 0  1  1  1  1  1  1  1  1    1  1  1  1  1  1  1  1
 1  0  1  1  1  1  1  1  1    1  1  1  1  1  1  1  1
 1  1  0  1  1  1  1  1  1    1  1  1  1  1  1  0  1
 1  1  1  0  1  1  1  1  1    1  1  1  1  1  1  1  1
 1  1  1  1  0  1  1  1  1    1  1  1  1  1  1  1  1
 1  1  1  1  1  0  1  1  1    1  1  1  1  1  1  1  1
 1  1  1  1  1  1  0  1  1    1  1  1  1  1  1  1  1
 1  1  1  1  1  1  1  0  1    1  1  1  1  1  1  1  1
 1  1  1  1  1  1  1  1  0    1  1  1  1  1  1  1  1
- In the above example, pressing the EXEC key causes GPIO input 3 to becomes 0 when GPIO output column 1 is enabled.
- The second mode, known as “scanning” causes the keypad to be scanned and he results displayed continuously. To exit this mode, press Control-C (using the console keyboard).
- Here is a session where the CLR key is pressed once, followed by a demonstration of what happens when multiple keys are pressed simultaneously.
- testFMCKeypad scan
Scanning keyboard … press any key on the FMC keypad to test.
Press Control-C (on the regular keyboard) to abort.
KEY PRESS row=01 col=08
KEY RELEASE row=01 col=08
KEY PRESS row=01 col=04
Multiple keys pressed.
Multiple keys pressed.
Multiple keys pressed.
Multiple keys pressed.
KEY RELEASE row=08 col=04
- Test to make sure that each individual key generates a unique row and col value, and that only one key is detected for every press. Also make sure that for each key press only a single press is registered. The software has some features to prevent the switch “bouncing“.
- Troubleshooting:
- In readall mode,
- If there are 0s in the input when no keys are being pressed, you have a short to ground somewhere.
- If there are multiple 0s in the Input section when a single key is pressed, you probably have a key stuck in the pressed position. This is possible if the you have fixed the the faceplate to tightly to the PCB. Check that each key has a “click” feel when pressed. The screws that mount the faceplate to the PCB should have three nuts, the first to fasten the screw to the faceplate, and two more that can be adjusted to hold the PCB at exactly the right distance.
- In readall mode,
LEDs
- The testFMCLED program tests the functionality of the LEDs.
- Note that on powering up the Raspberry Pi, it is normal for the LEDs to be in a random state, with some lit and some unlit. This is because the control signals that switch them on or off have not been configured as outputs by the software yet, and so they are in an undertermined state.
- The testFMCLED program is used as follows:
testFMCLED (exec|dspy|fail|msg|ofst) (on|off)
- The first second indicates which LED to control, and the third word determines whether that LED should be set to on or off.
- Test by first turning all the LEDs off:
testFMCLED exec off
testFMCLED dspy off
testFMCLED fail off
testFMCLED msg off
testFMCLED ofst off
- At this point, all the LEDs should be off.
- Now turn them on one by one.
testFMCLED exec on
testFMCLED dspy on
testFMCLED fail on
testFMCLED msg on
testFMCLED ofst on
- The LEDs should light up one by one.
- Finally, turn them off:
testFMCLED exec off
testFMCLED dspy off
testFMCLED fail off
testFMCLED msg off
testFMCLED ofst off
- Troubleshooting
[ This section to be filled in based on user feedback ]
Installing the ExtPlane Plugin into your X-Plane Flight Simulator
- The Pi X-Plane FMC CDU relies on the ExtPlane plugin to communicate with the X-Plane flight simulator.
- You will need to download and install the “Ext-Plane Plugin” software onto your Flight Simulator PC.
- The download link and installation instructions can be found here: https://github.com/vranki/ExtPlane
- Note that you do not need to install the “Ext-Plane Panel” for the FMC CDU to work.
Starting the Pi XPlane FMC CDU Application
- Login to your raspberry pi.
- Execute the following:
- piXPlaneFMCCDU
- The welcome screen should appear for a few seconds:
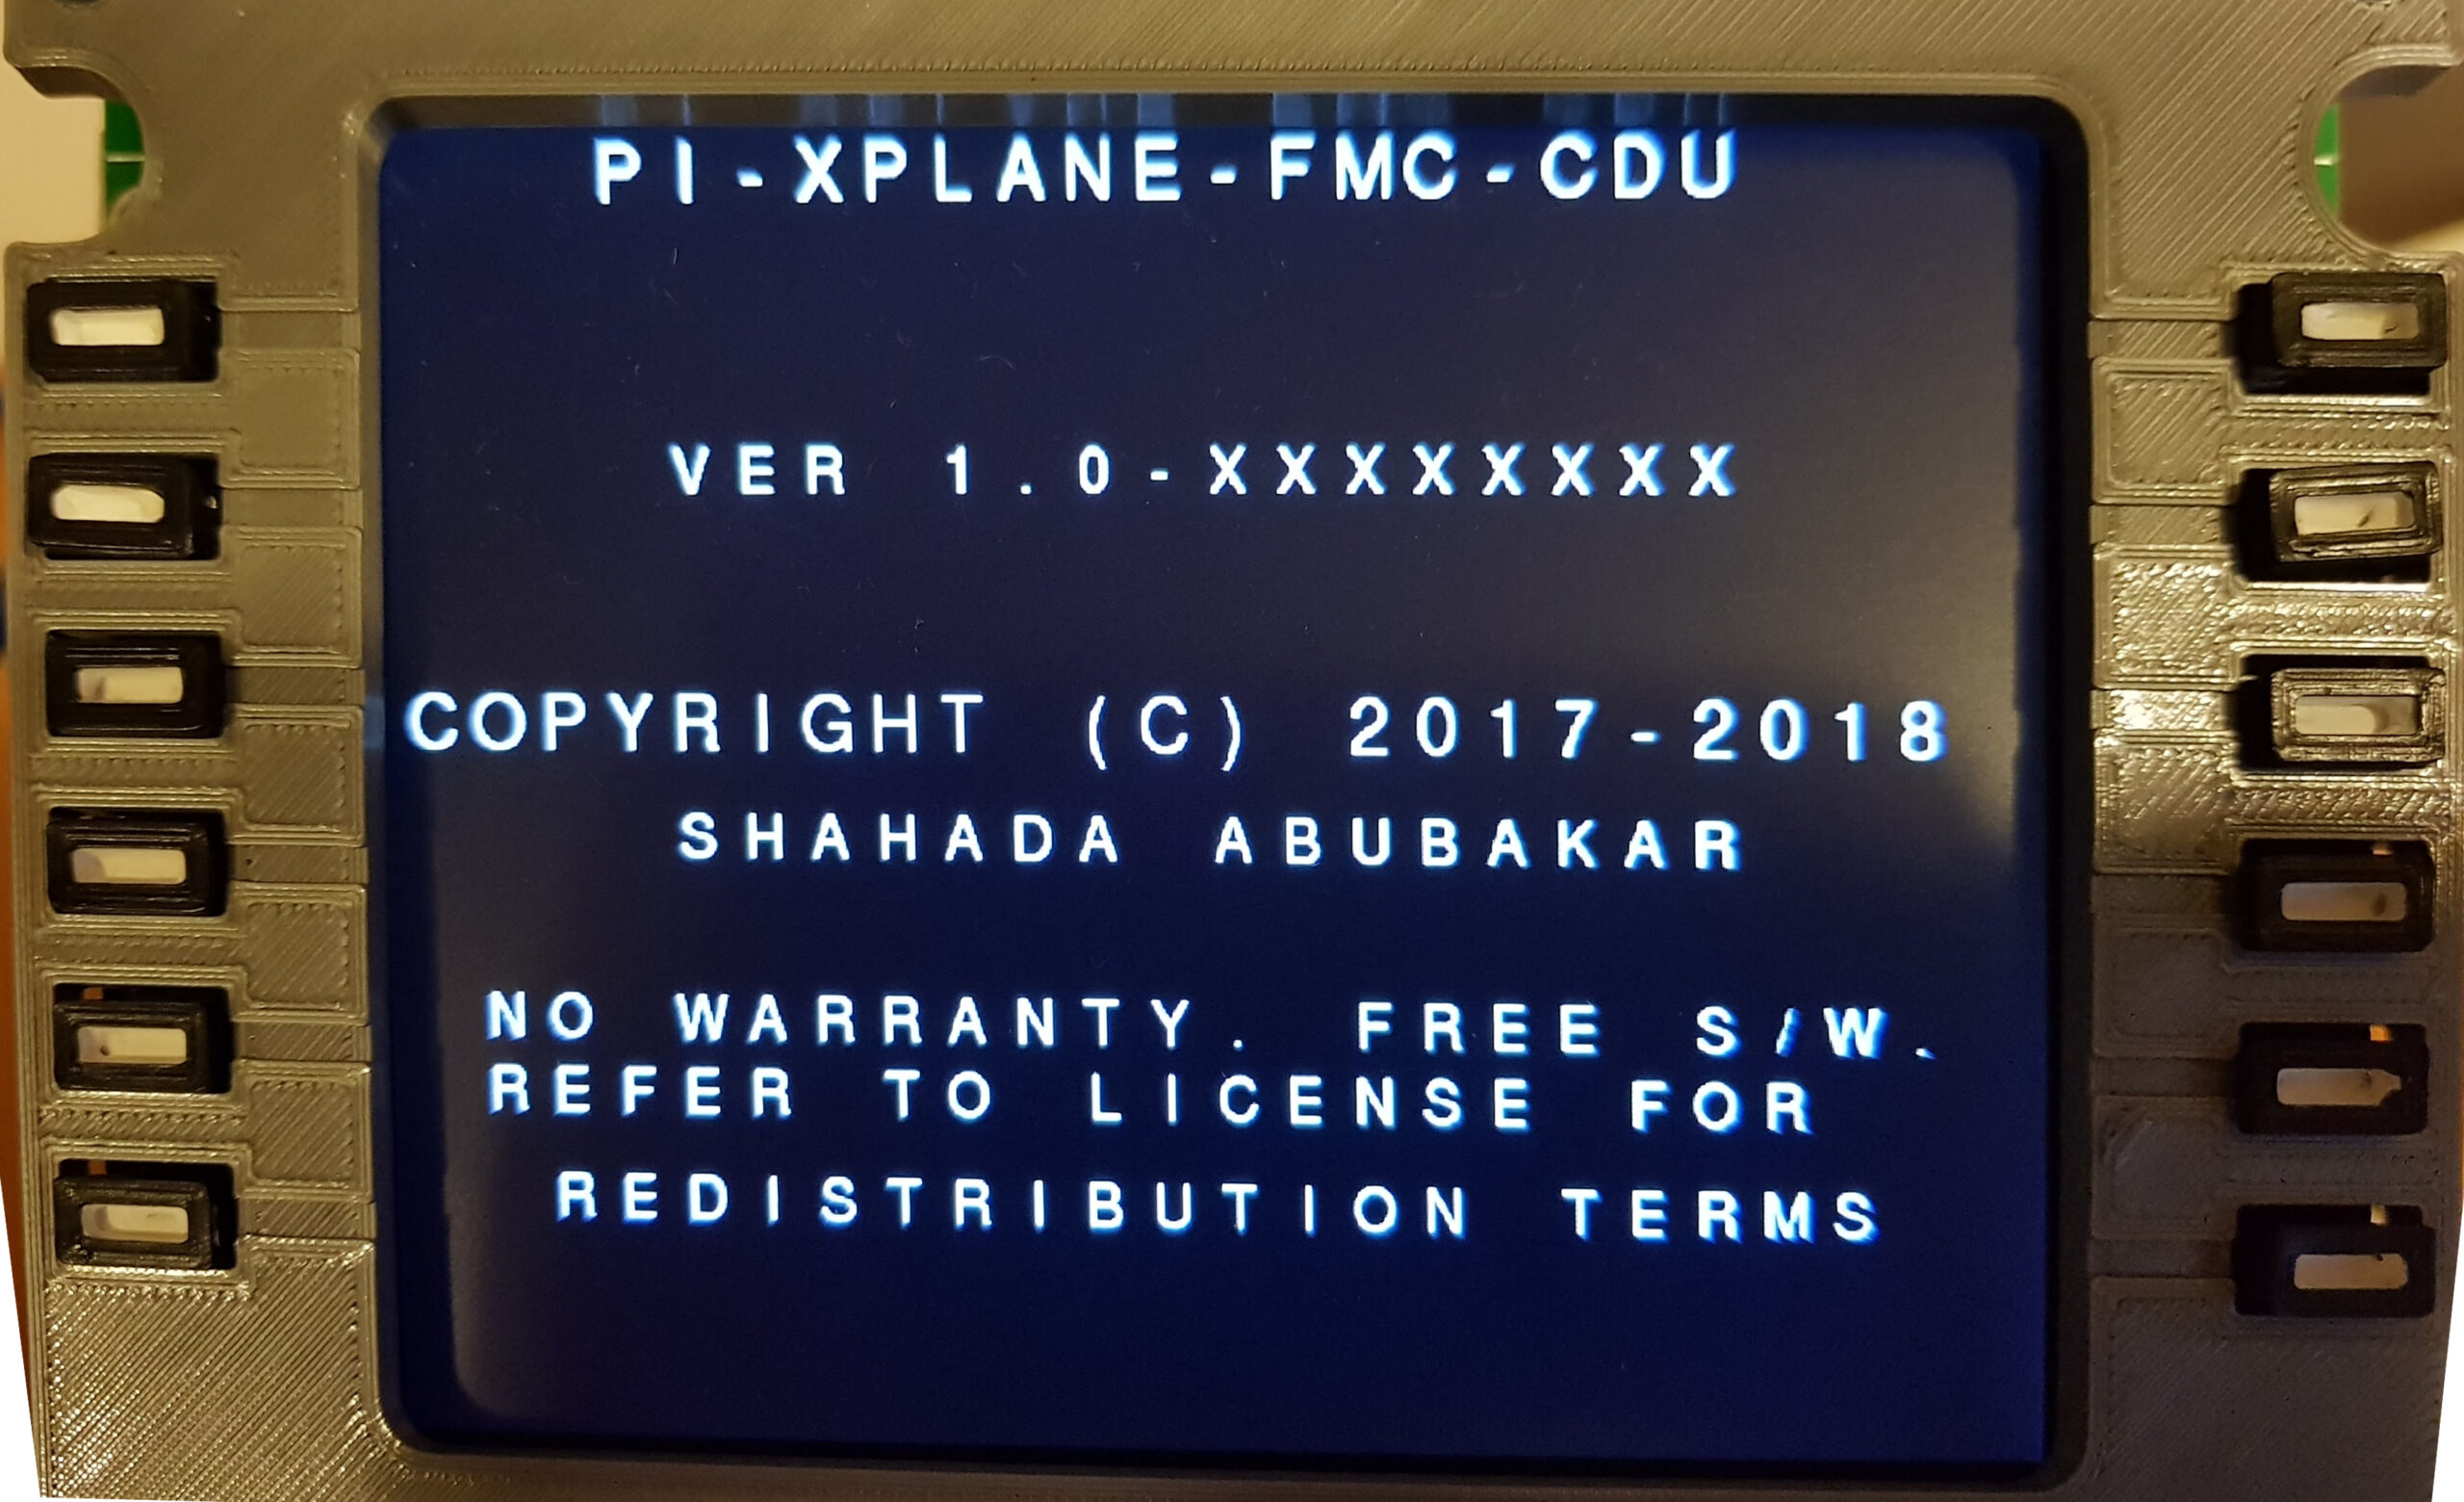
- Be aware that there are terms and conditions associated with the usage and redistribution of this software. It is licensed under the GNU GPL V3 license, which can be found here https://www.gnu.org/licenses/gpl-3.0.en.html.
Connecting to the X-Plane Flight Simulator
- The Pi X-Plane FMC CDU application searches your network for running instances of X-Plane, so as long as the Pi X-Plane FMC CDU is connected to the same WiFi or LAN as your flight simulator, you do not have to do any configuration.
- The following screen appears while waiting.
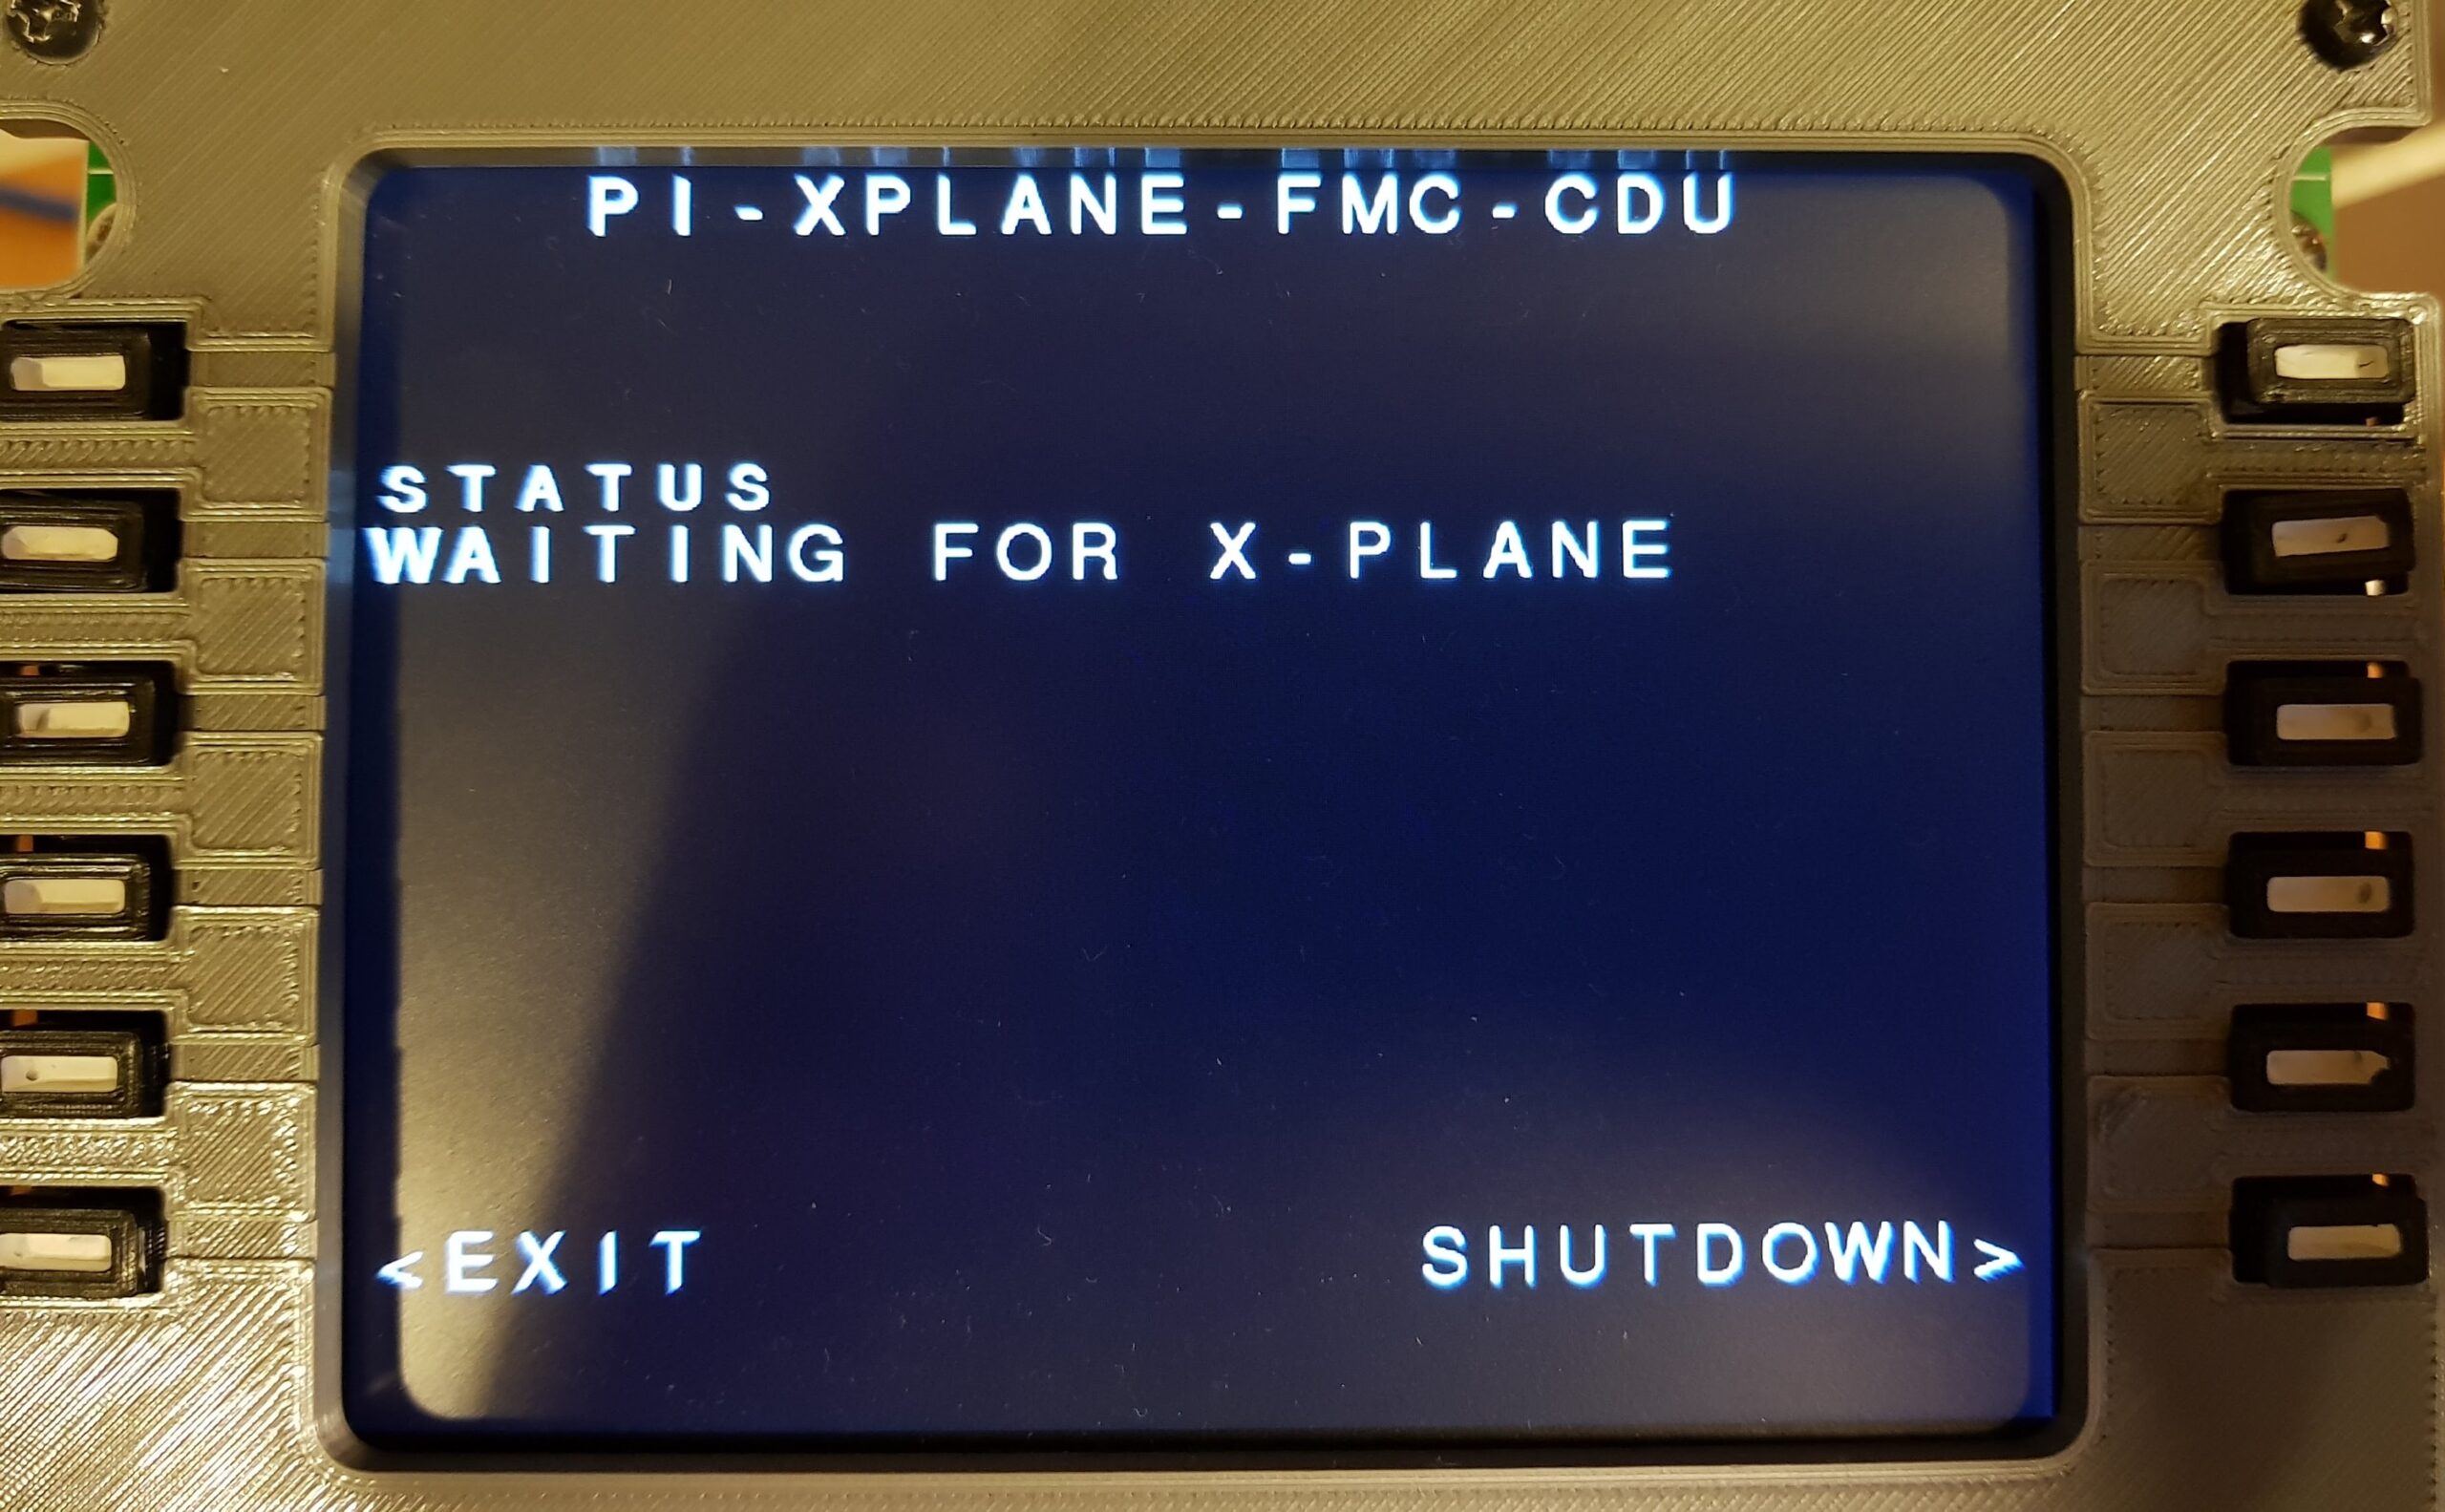
- Pressing the LSK6 (Left Soft Key 6, the button pointed to by the EXIT message) will cause the Pi X-Plane FMC CDU software to exit and return you to the shell.
- Pressing the RSK6 (Right Soft Key 6, the button pointed to by the SHUTDOWN message) will shutdown the raspbian operating system on the Raspberry Pi. It is recommended that you do this before switching off the power to the device.Â
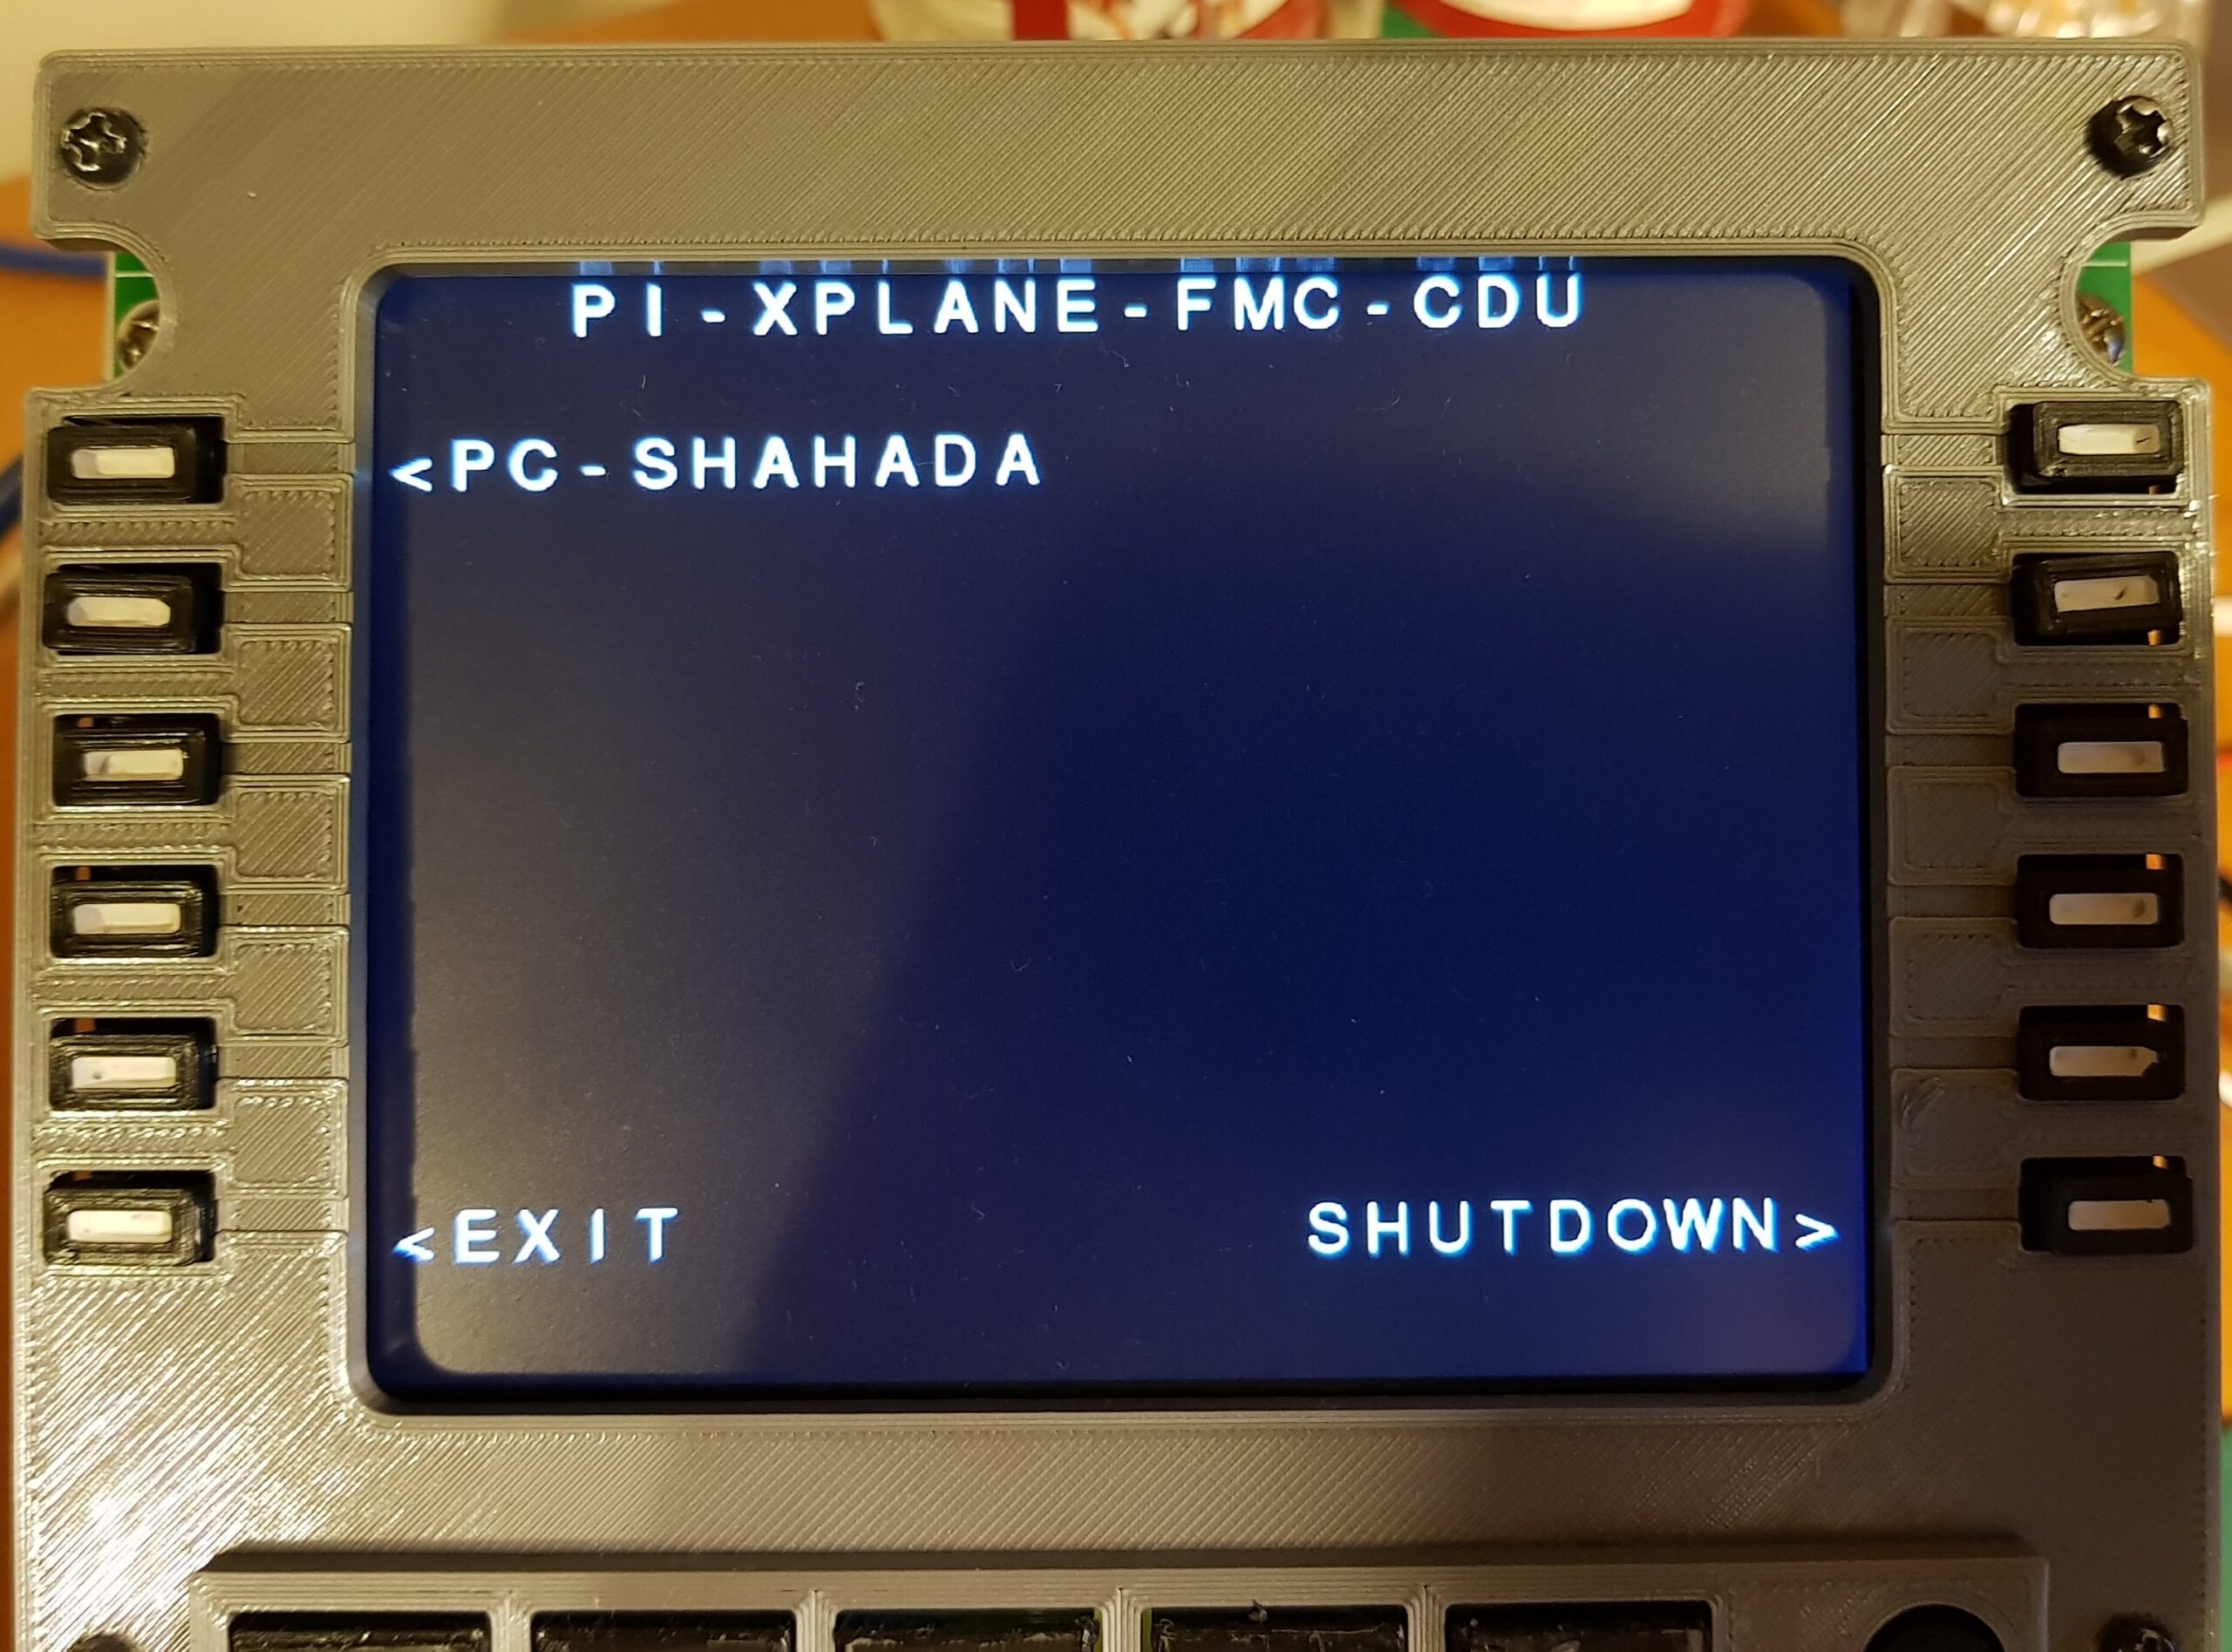
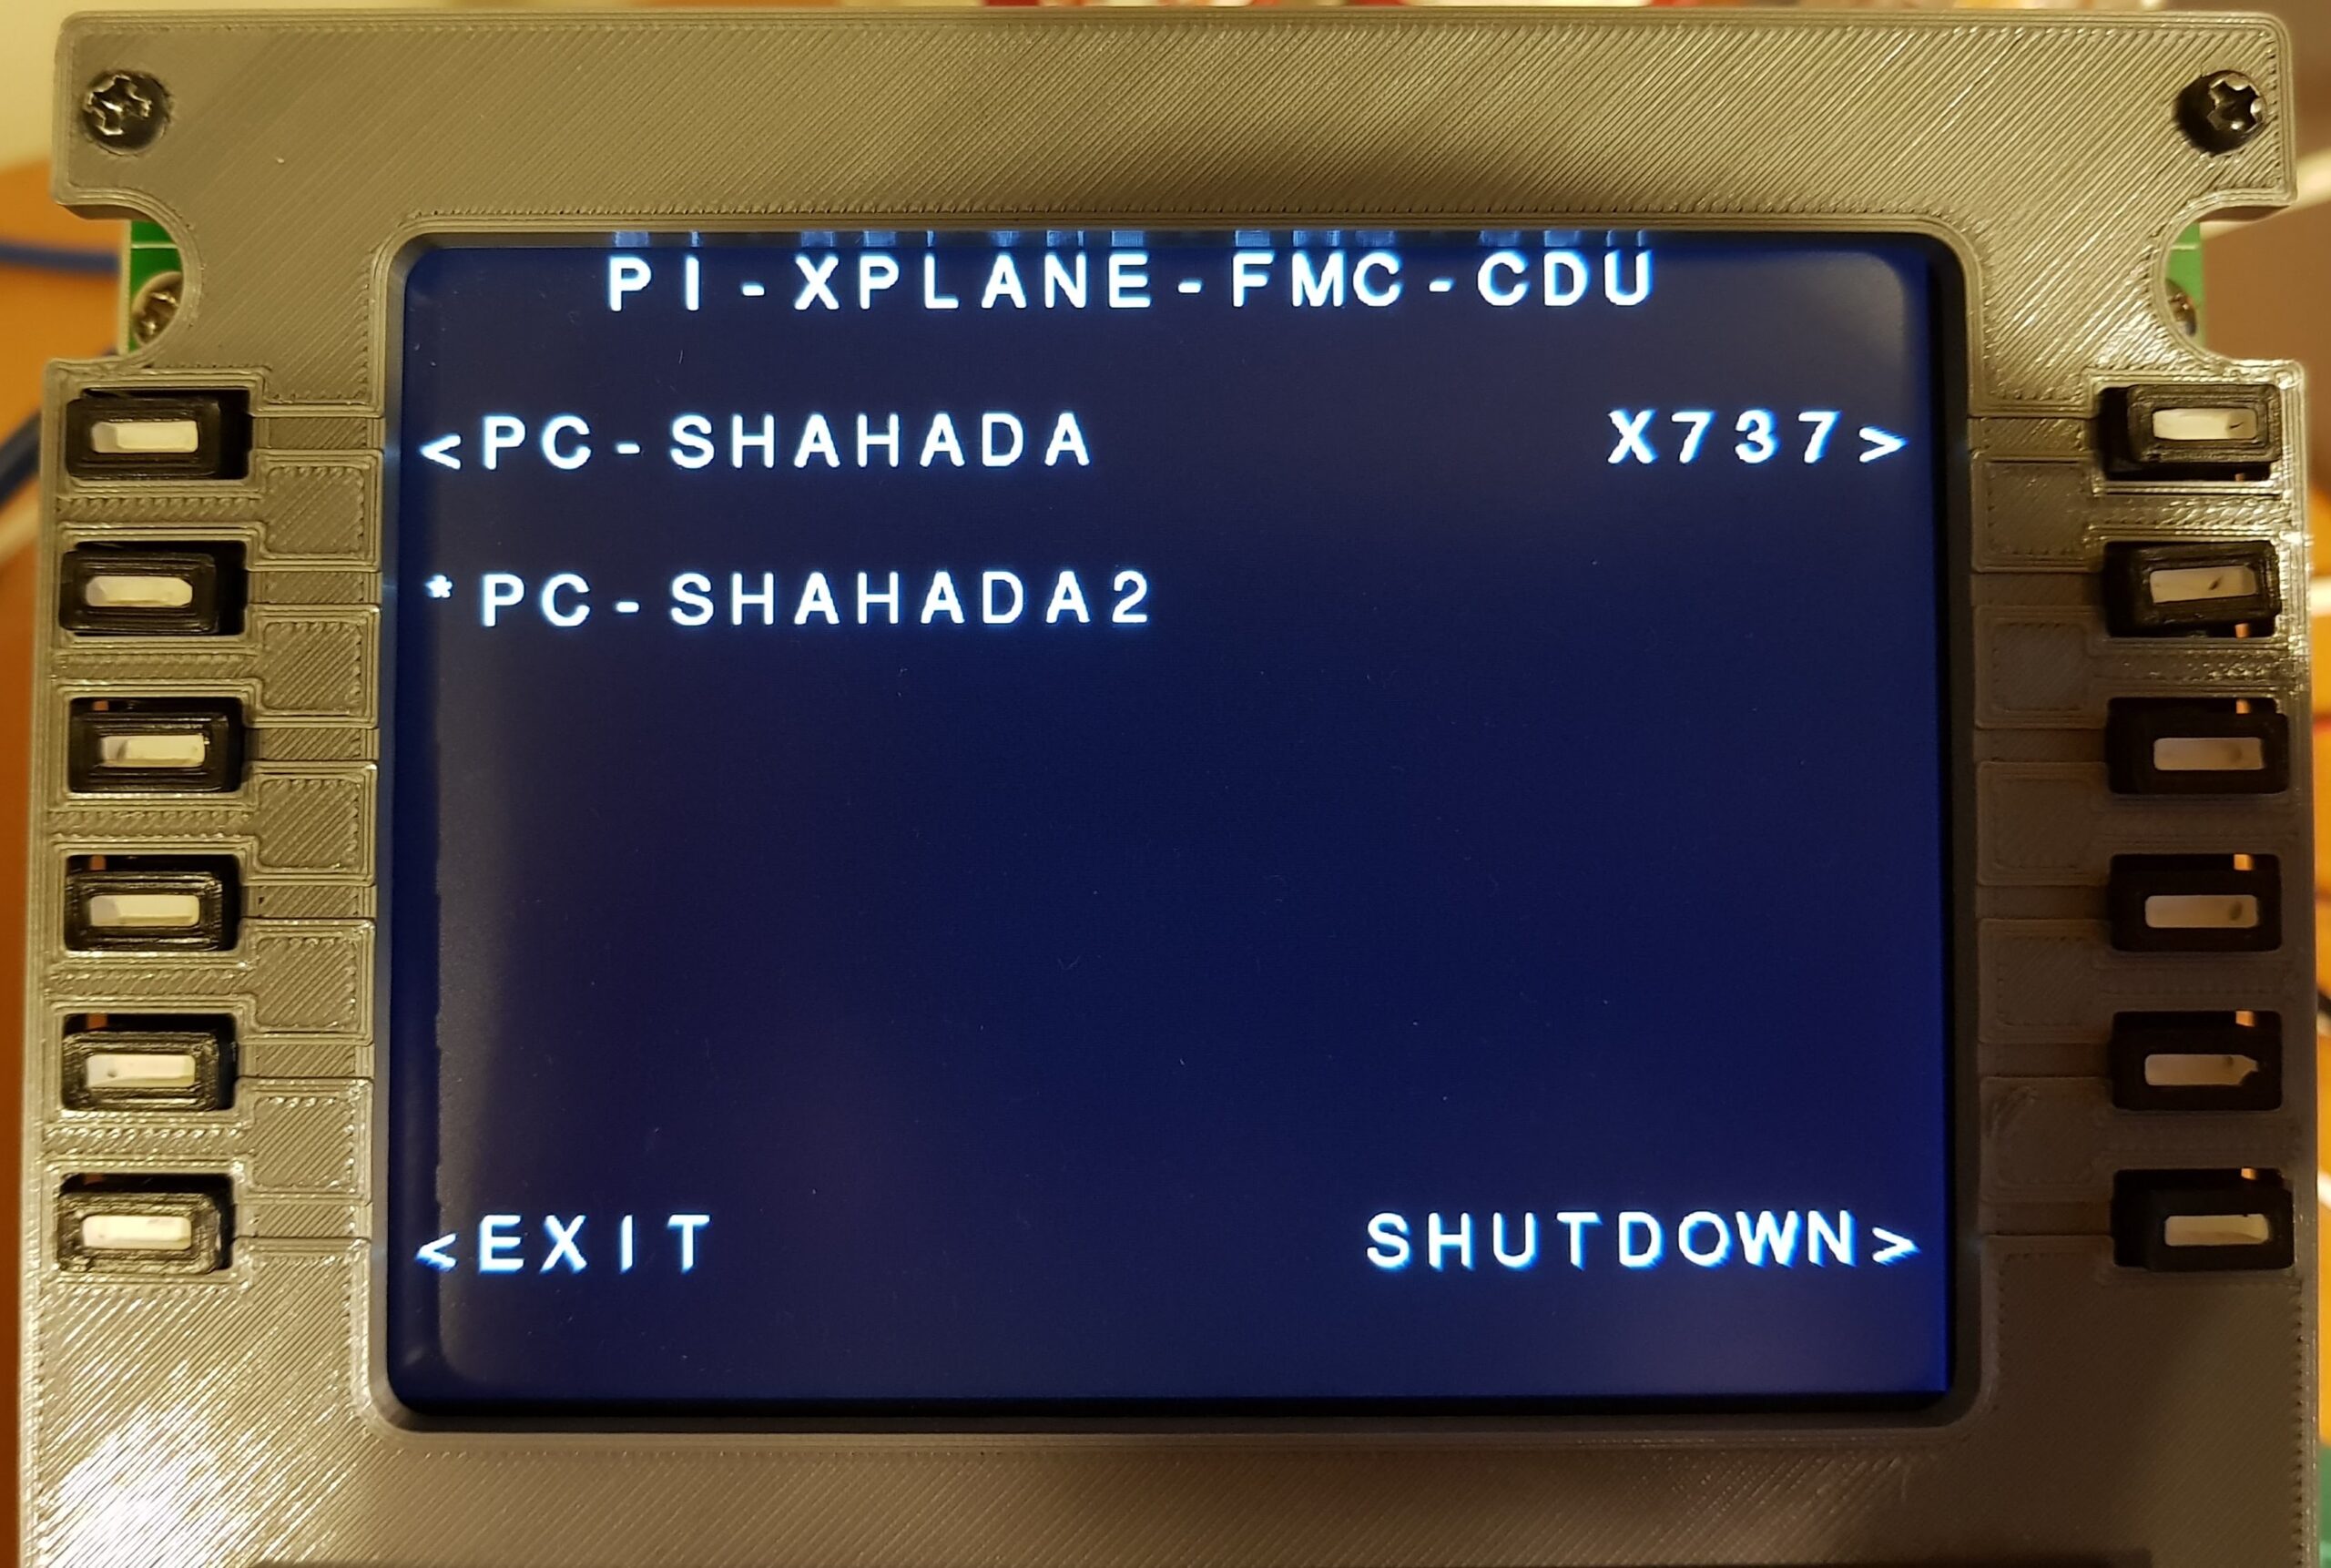
- When a running instance of X-Plane has been detected, the name of the computer it is running on will be displayed on the left side of the screen.
- If you have more than one running instance of X-Plane on your LAN, then multiple entries may appear:
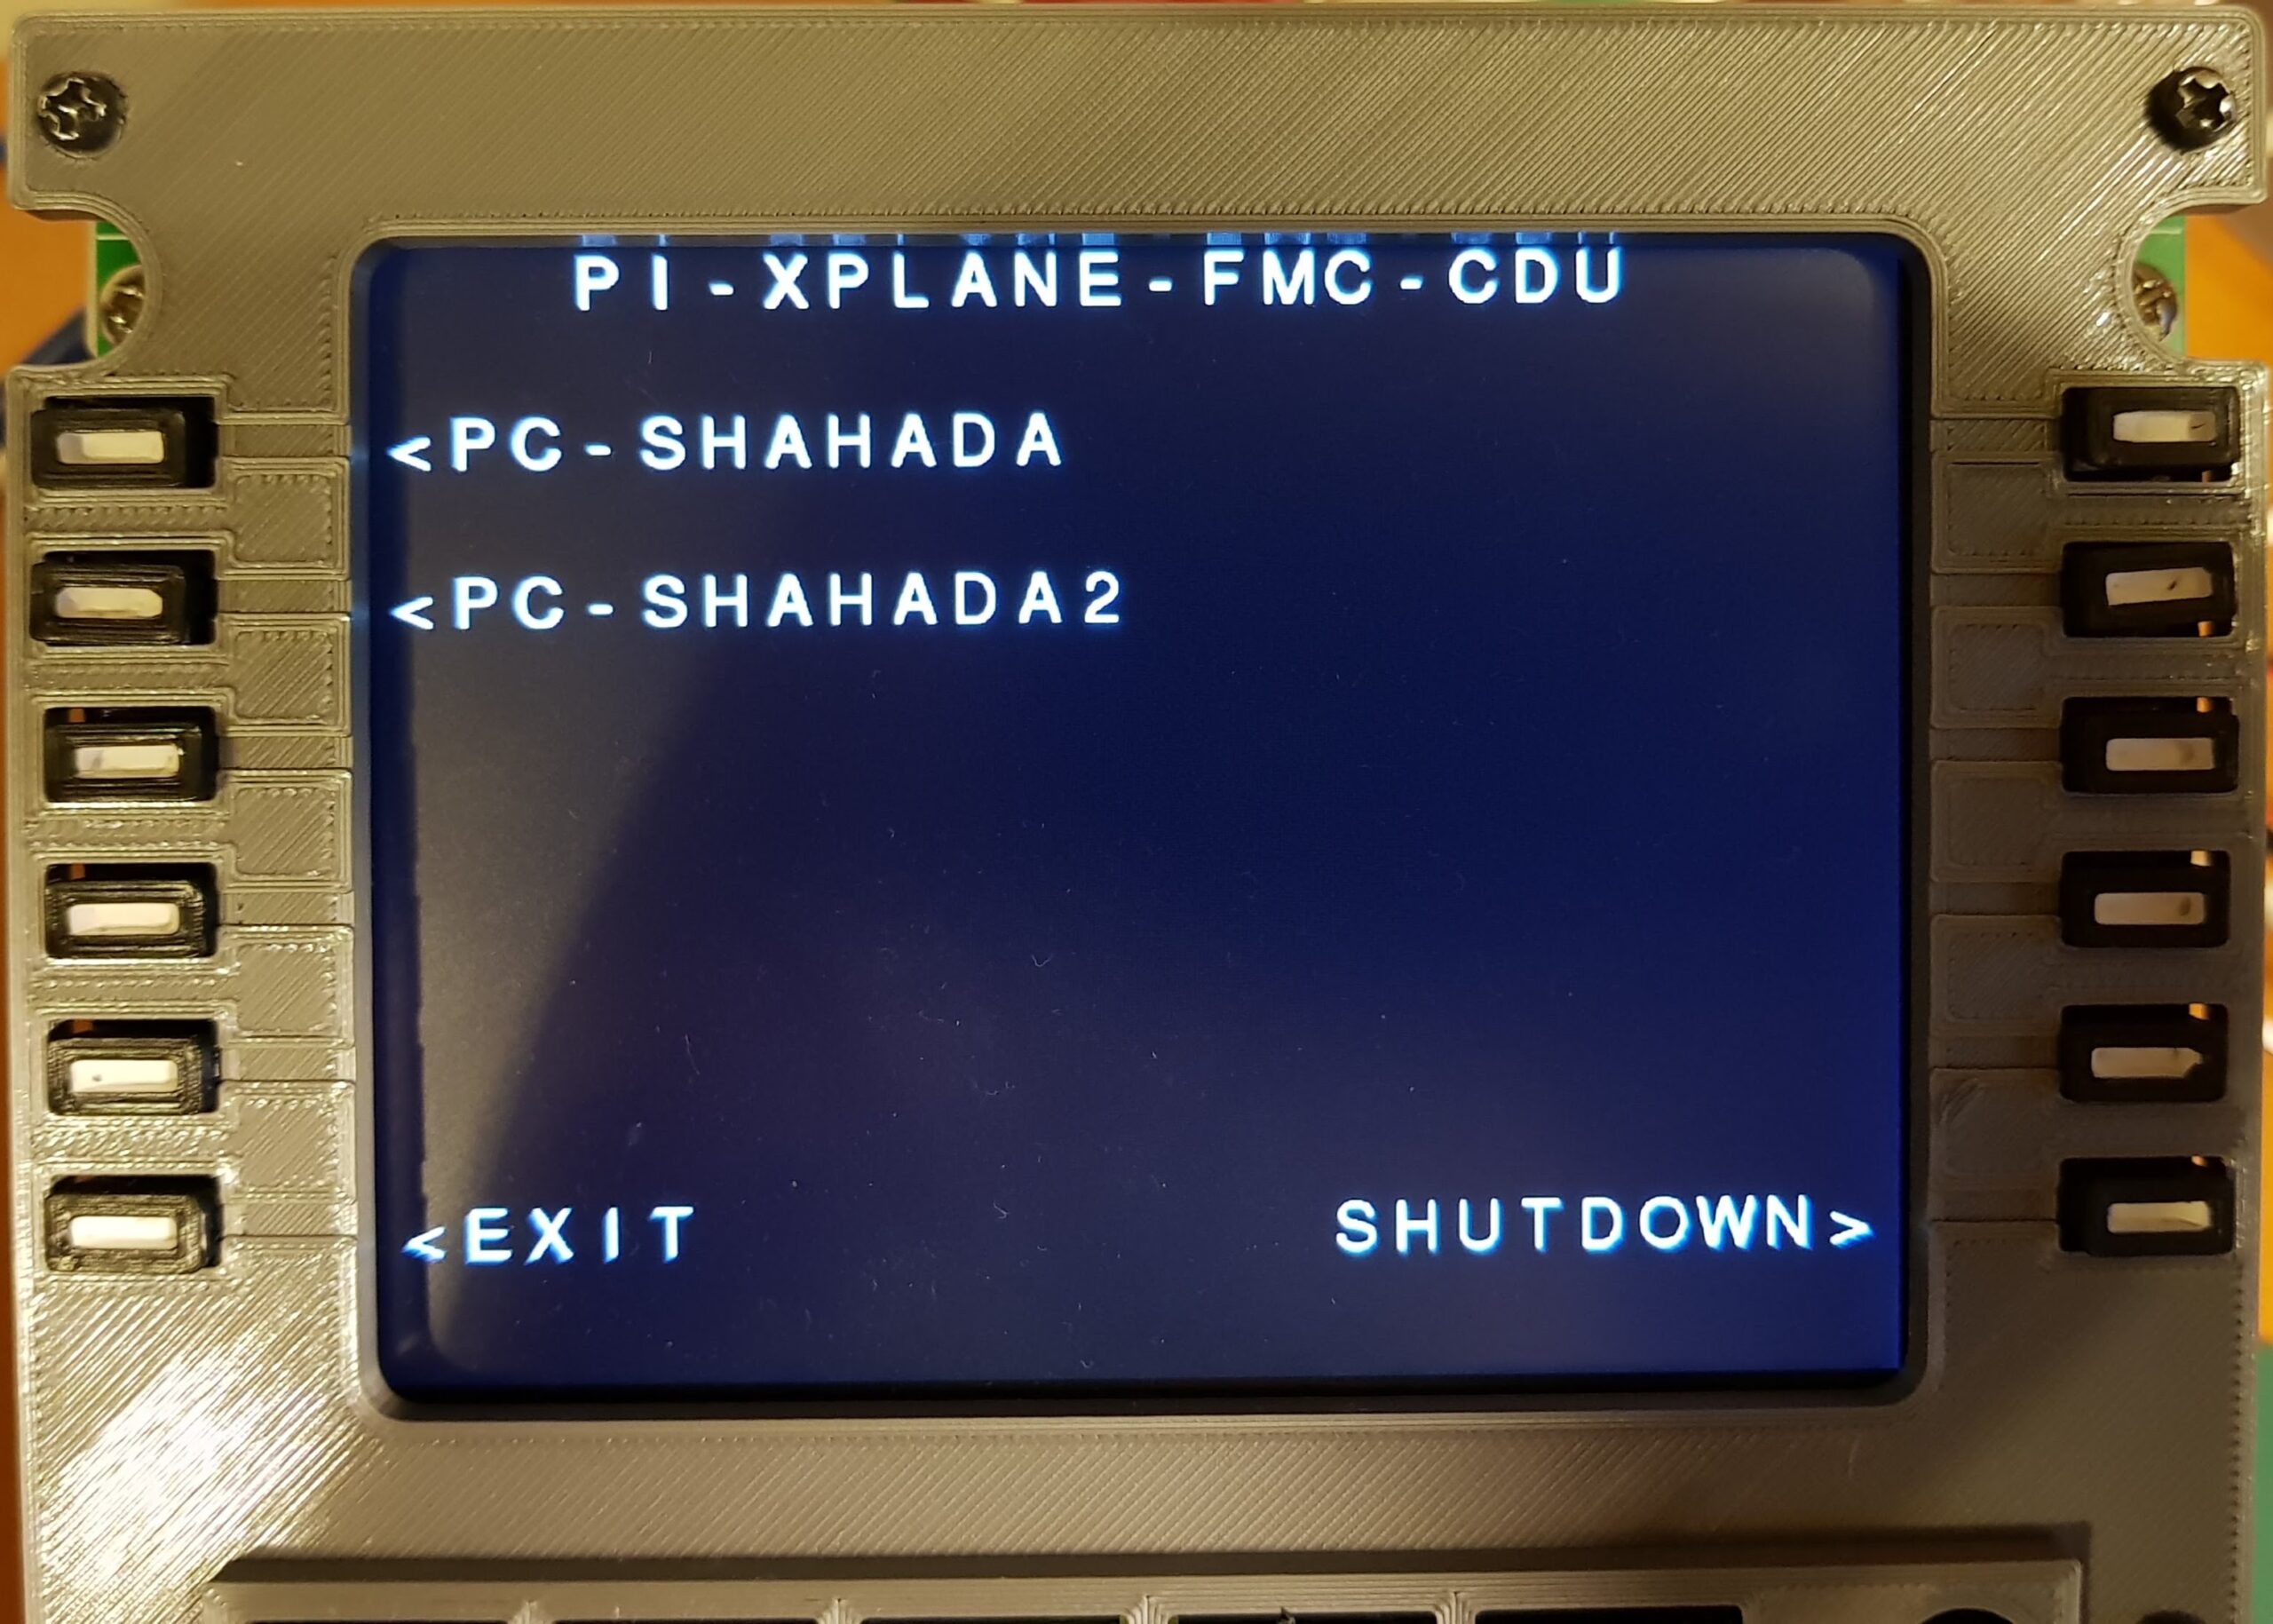
- Press the LSK next to the PC name that you wish the Pi X-Plane FMC CDU to connect to. Once the Pi X-Plane FMC CDU establishes a connection to the EXTPlane plugin running in the flight simulator, the “<” symbol will change to a “*“.
- If you press the LSK but do not get a “*”, it means that there is a problem connecting to the EXTPlane plugin. Be sure to allow the connection (TCP port 51000) if you have a firewall running on the PC, or disable the firewall completely.
- If you have connected to the wrong PC by mistake, simply press the RSK of the correct PC to change the connection.
- The Pi X-Plane FMC CDU will now check to see what FMC software is available in the flight simulator. This will depend on what FMC Software you have installed, or what aircraft you currently have running.
- The detected FMCs will be displayed on the left side of the screen:
- Select the FMC you wish to use by pressing the appropriate RSK. The “>” symbol next to the selected FMC will change to a “*”. The EXEC key light will also illuminate.
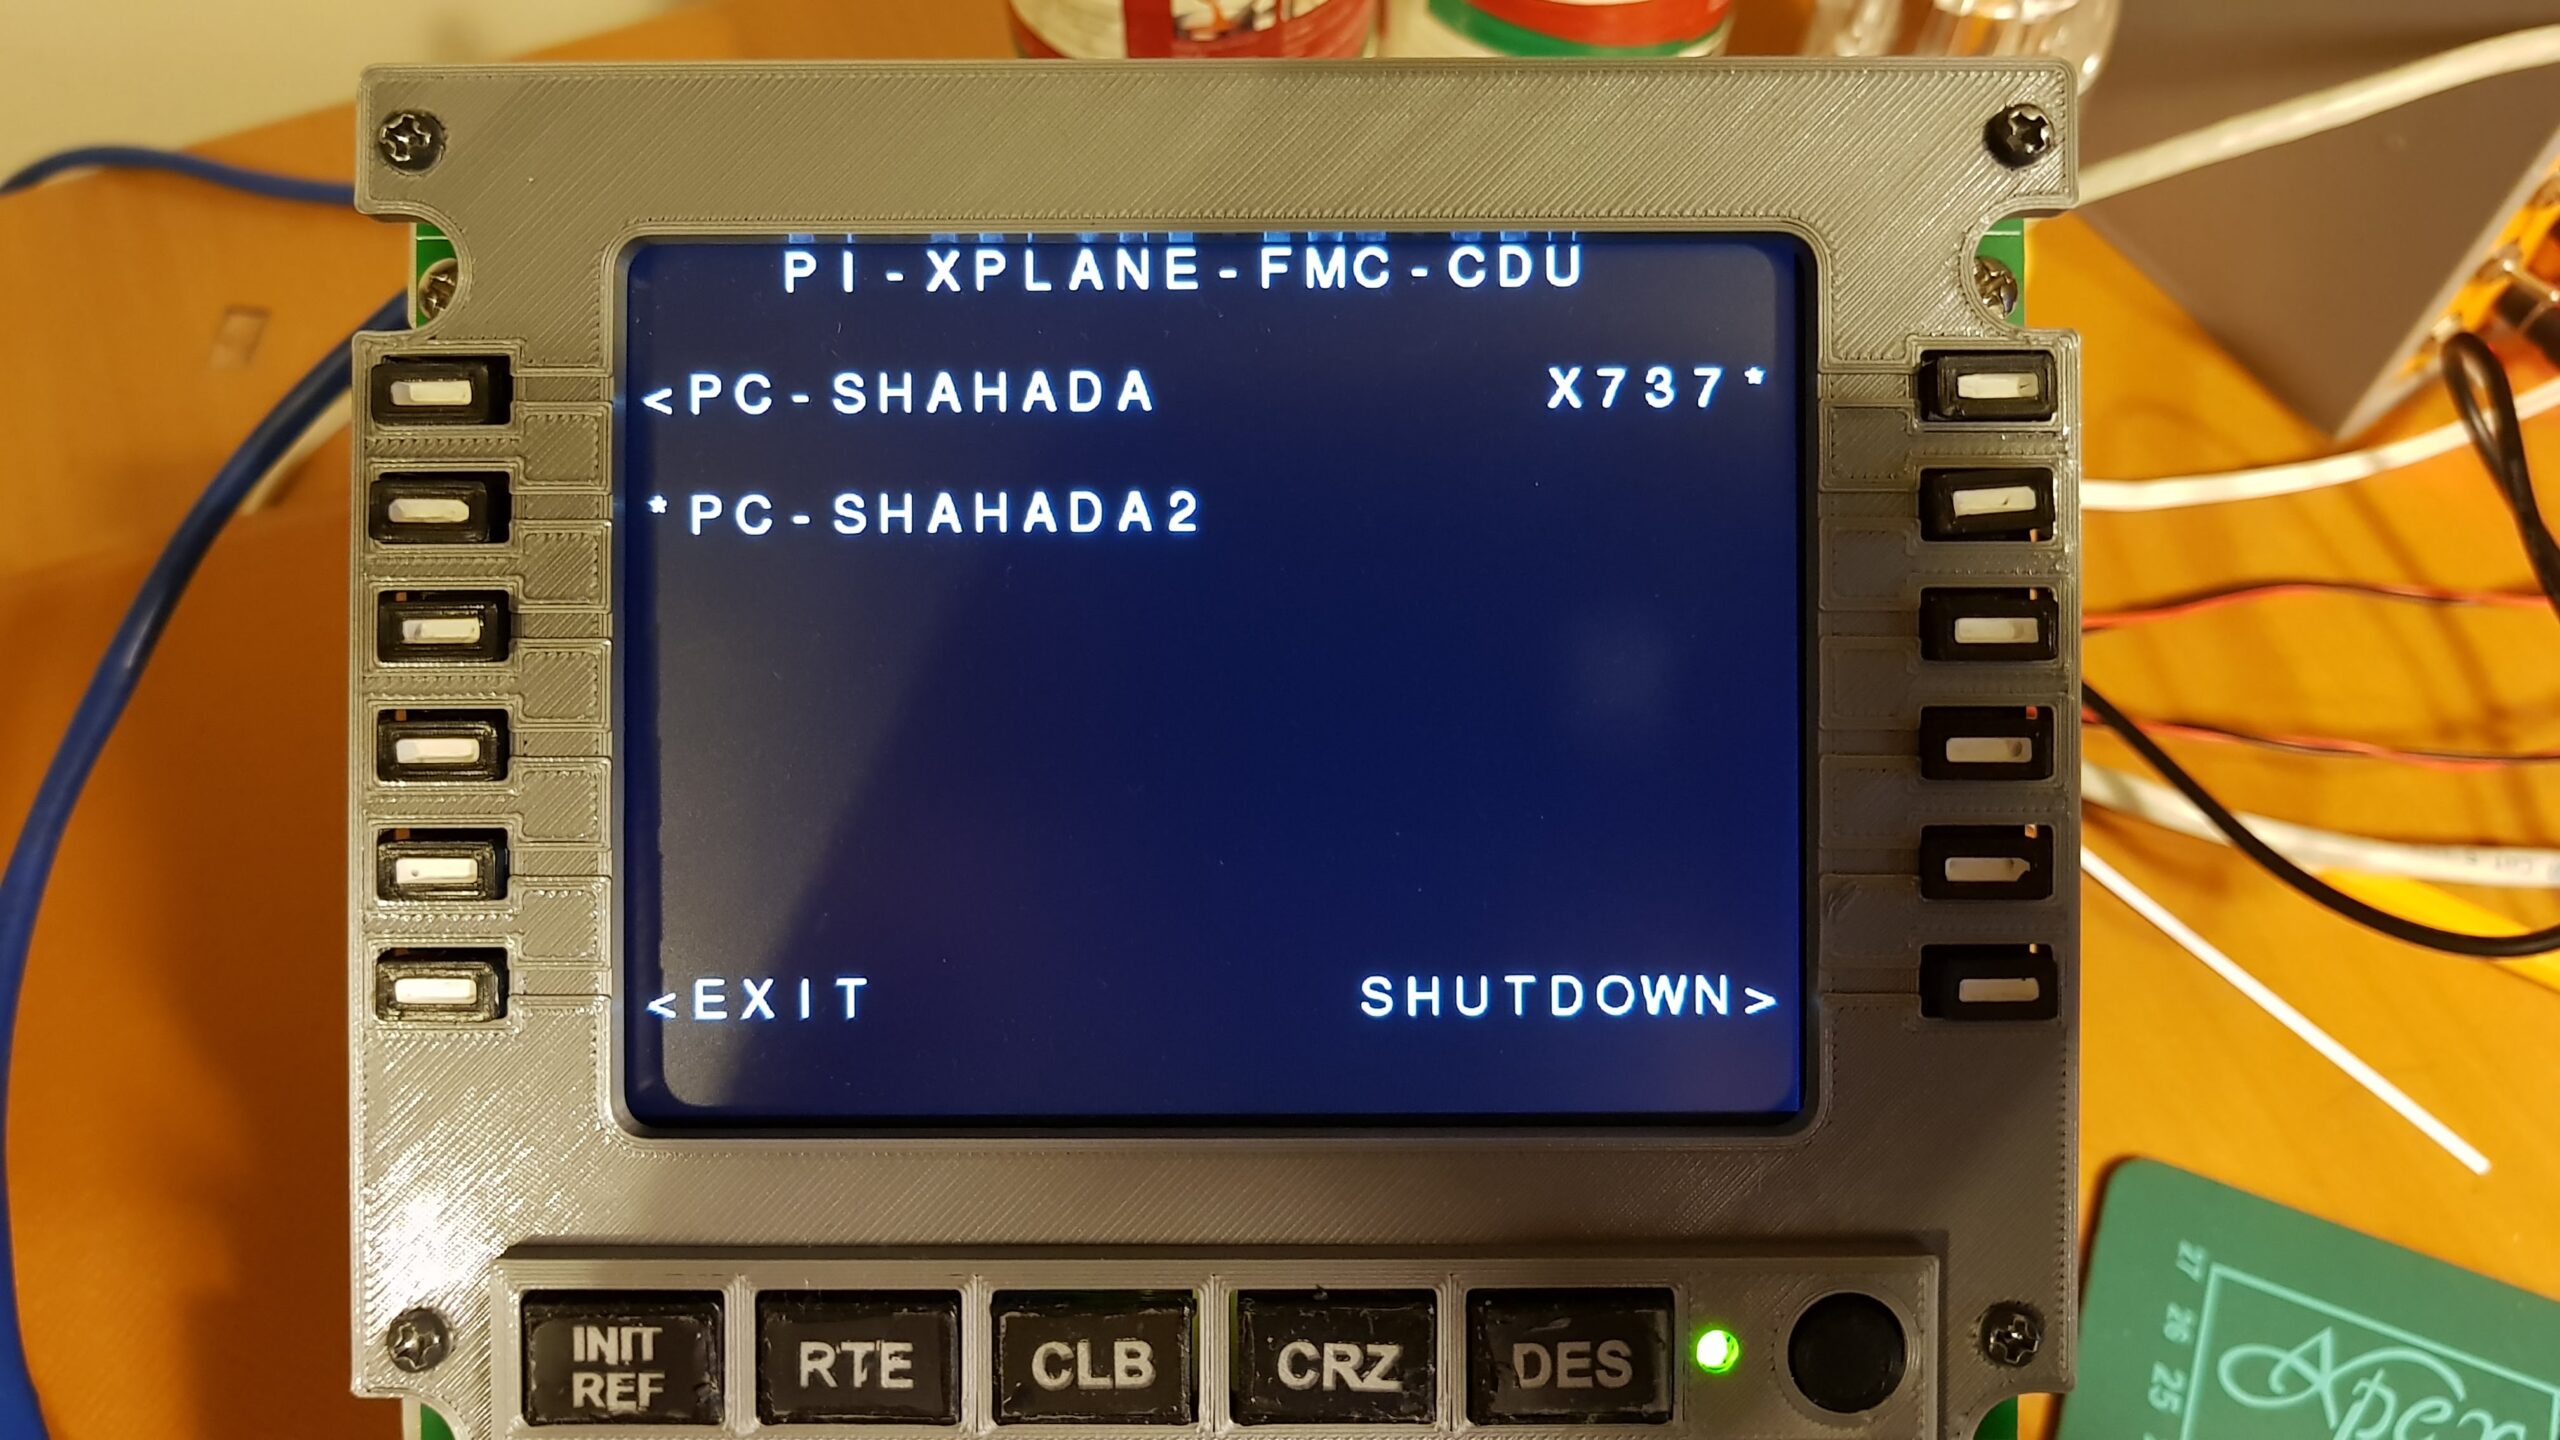
- Finally, press the EXEC key to begin using the FMC CDU.
- The next screen displayed will be that of the FMC you have selected, mirroring the one in the flight sim.
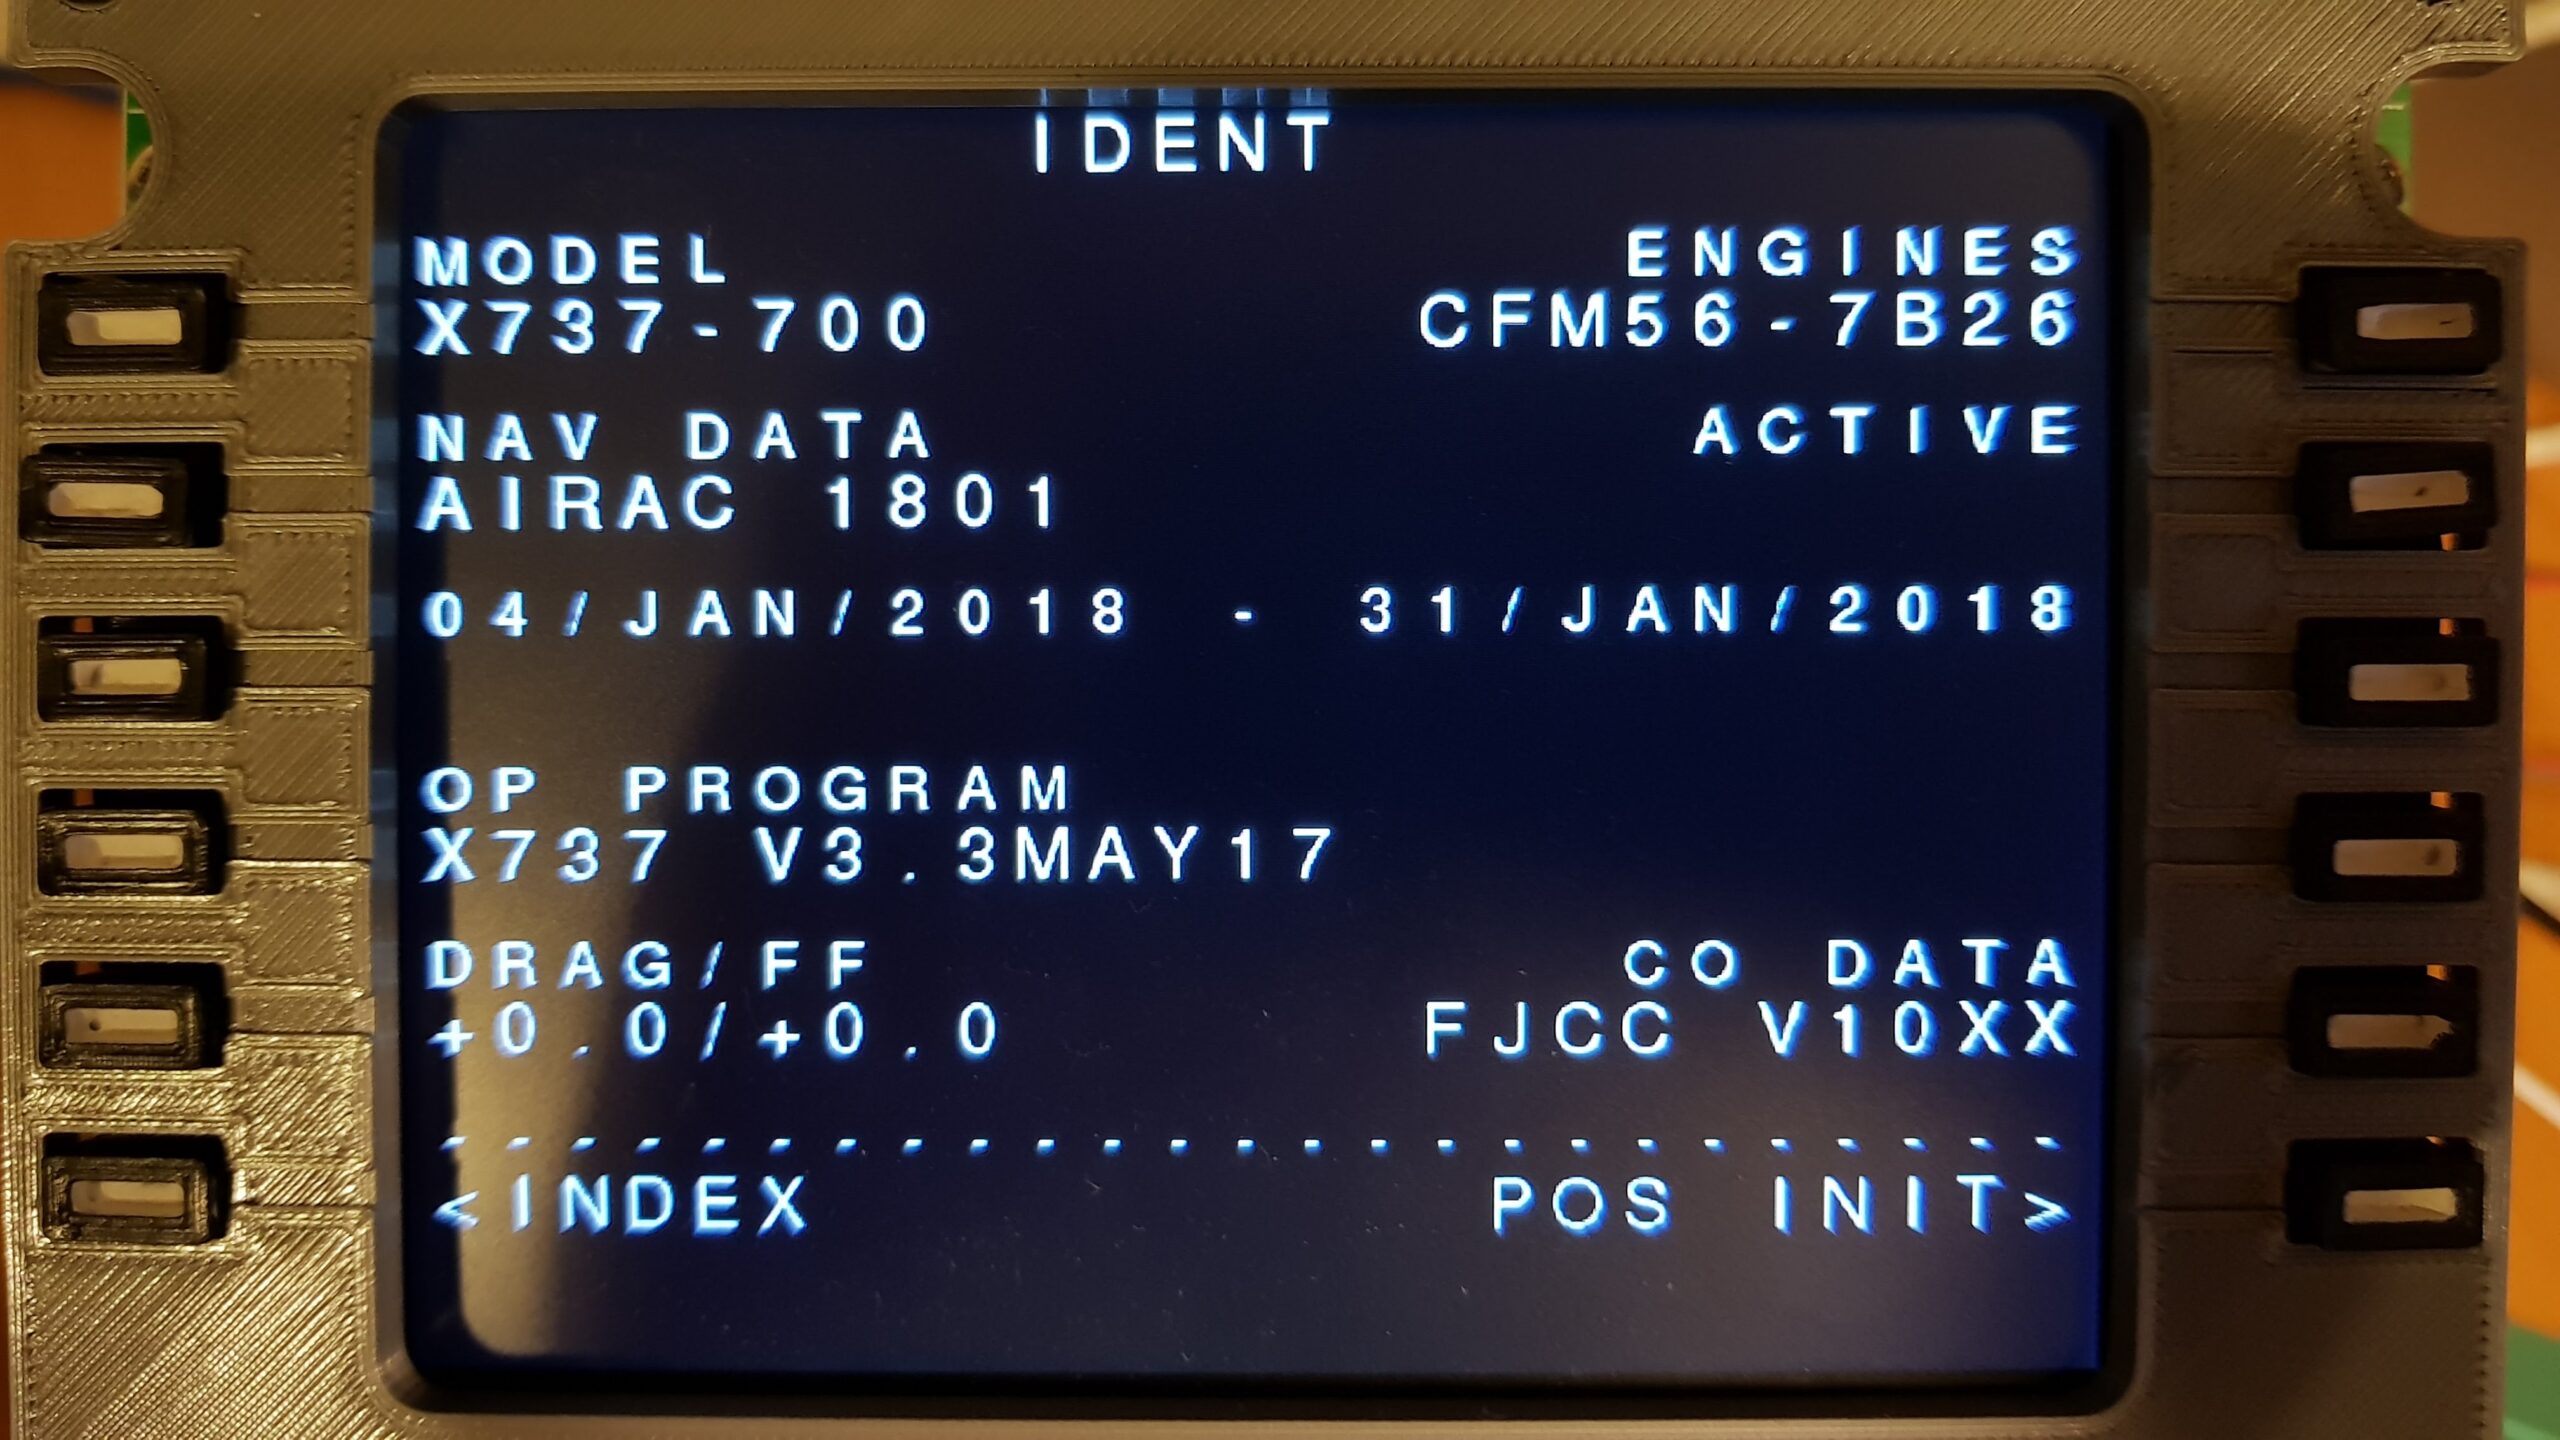
X737FMC IDENT Screen
- From here on, pressing any of the keys on the FMC CDU will cause the same key to be pressed within the flight sim, and the screen to be updated accordingly.
Returning to the Pi XPlane FMC CDU Screen
- At any time, you may return to the Pi XPlane FMC CDU screen by holding down the CLR key for more than 2 seconds.

- To return to your flight simulator’s FMC Screen, press the EXEC key.
- Alternatively, you may choose to switch to a different FMC, a different PC, Exit or Shutdown.
Automatically running PiXPlaneFMCCDU on startup
- To have Pi XPlane FMC CDU start automatically when the Pi is powered up, execute the following:
- sudo systemctl daemon-reload
- sudo systemctl enable piXPlaneFMCCDU
- The next time you switch on the Pi, the Pi XPlane FMC CDU will start automatically. Choose “<Exit” or “Shutdown>” to leave the Pi XPlane FMC CDU.
- To revert to starting the Pi XPlane FMC CDU manually, execute the following:
- sudo systemctl disable piXPlaneFMCCDU
Originally created with EverNote at 20180116T155650Z