VMWare: Resizing Windows XP’s C:

It’s a typical situation for most Linux users … you acquire a copy of VMWare, create a XP system for “testing purposes”. Since it’s only for testing, you only allocate 8GB of space for C:. You start testing more and more stuff. You start tweaking it to be useful. You test more and more stuff. And then you start regretting allocating only 8GB of disk space …
-
- Shut down your vmware instance.
-
- Clone it (to make a backup).
-
- Edit Virtual Machine Settings:
-
-
- Select “Hard Disk”
-
-
-
- Click “Utilities” and choose “Expand”
-
-
-
- Enter a sufficiently large size or you’ll be here again
-
-
-
- Click “Expand”
-
-
- Boot up into the vmware instance
-
- Download Easeus Partition Master, Home Edition
-
- Open the .zip and run epmsetup.exe
-
- Install it (hopefully you still have a little space left in your C:
-
- Close all other running apps
-
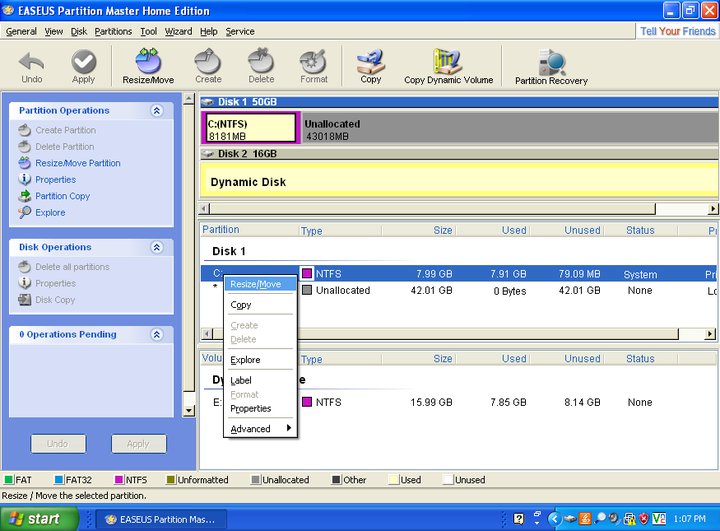
- Run Easus Partition Manager Home Edition
-
-
- Right click on C:, and choose “Resize/Move”
-

-
-
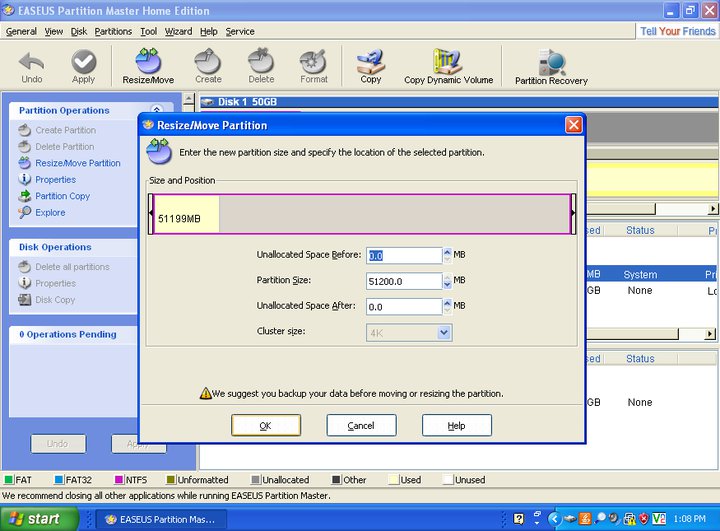
- Choose the maximum partition size (drag the slider or set “Unallocated Space After” to 0) and click OK)
-

-
-
- Click “Apply” followed by Yes
-
-
-
- Operation should take a second or two. Press OK when done
-
-
-
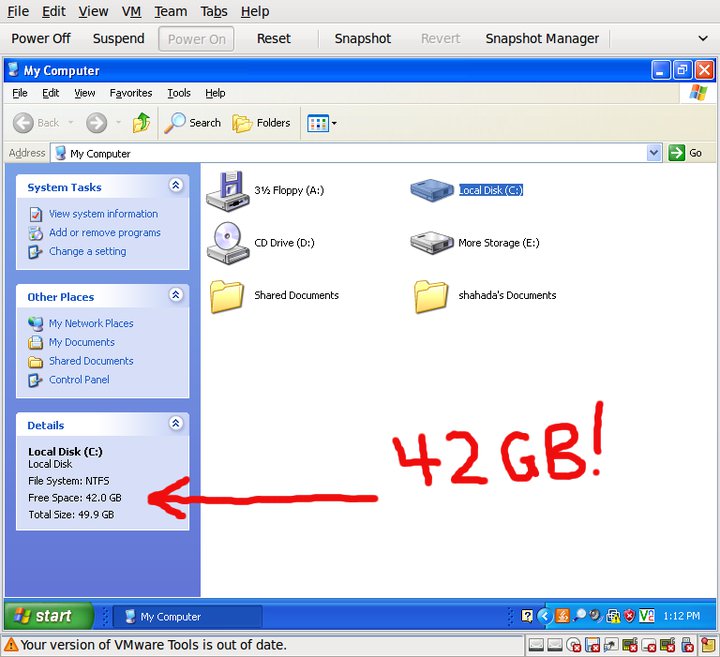
- You’re Done:
-

-
- Reboot just to be safe.
-
- If everything is ok, go ahead and delete your cloned instance.
This post was originally published as a Facebook Note at 2010-03-10 13:16:55 +0800.


